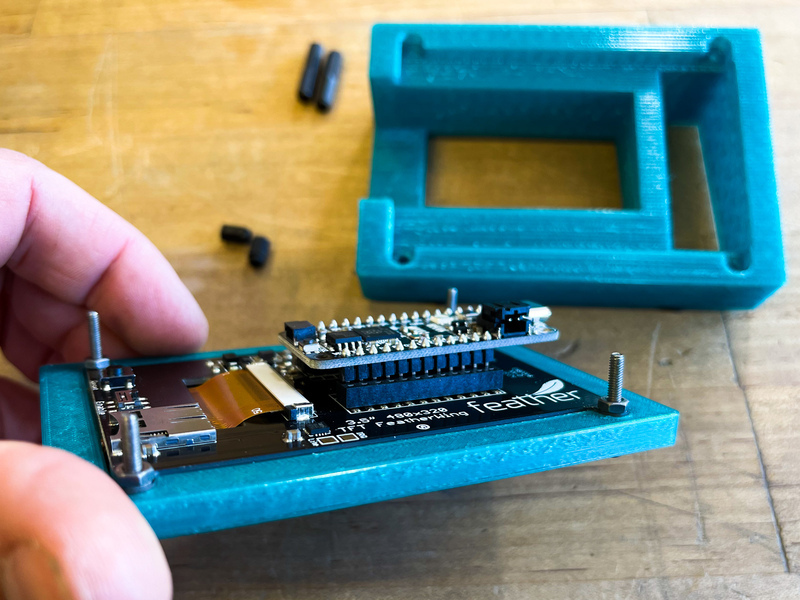
To build the case as shown here, first 3D print the base and top models:
Feather + Wing
Solder header pins under the Feather board as shown so that you can plug it into the TFT FeatherWing.
See this guide section on "Soldering Plain Headers" for more info.
Case Top
The TFT fits into the case top snugly. Note that the bezel has one slightly wider side which should be on the right side of the display to cover the blank area of the screen assembly.
Top Screws
Insert the four M2.5 x 16mm long screws from the top of the case, going through the mounting holes of the TFT. Thread the four nuts onto the screws, getting them finger tight.
Standoffs
Assemble four sets of standoffs and screws into two different lengths as shown. These will be screwed onto the long screws from underneath the base.
Insert the two longer standoffs into the deeper holes, and the two shorter standoffs into the shallower holes.
Assemble
Push the case top and screen/Feather into the base and then screw the standoffs onto the screws.
You can see here some suggested placements for the four rubber bumper feet. These help prevent sliding.
USB Plug
You can plug your Touch Deck into your computer directly with a USB-C cable, or get a snazzy right angle adapter!
Use the Touch Deck
The Touch Deck launches with your default layer of icons. Use any of them now, or pick a different layer with the Layer Next or Layer Back buttons.
Press the Layer Home button to return to your default layer at any time.
Customize
The Touch Deck download from the previous page includes the icons and layer file for three different pages: YouTube Controller, Discord Adafruit Emoji, and Greek/Math Symbols.
You can create your own custom icons and layers, such as this Wirecast streaming setup that includes eight camera switching controls plus four app launcher/switcher buttons.


