
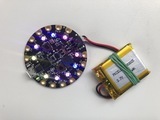

Wrap a rubber band around your battery, holding the leads gently against the battery pack. These leads are delicate, and this will keep them from breaking off. Plug the battery into your Circuit Playground Express. If it's all working, secure the battery to the back of the Circuit Playground with another rubber band.

Use a pair of scissors to cut the bottom inch or so off your water bottle. It's better to cut it a little too big rather than too small - you can trim it down later if you need to.


Fill the bottom of the bottle with hot glue. Get it into all the divots and fill to a level where even the center has some hot glue on it. Let the hot glue cool completely until it's hard.

Place your Circuit Playground Express inside and see how it looks! If it's not diffused enough, add more hot glue.

Cut a circle of cardboard the same size as the gem. You can trace around the gem with a pen, then cut on the line you made. Make a small hole at the top of the cardboard circle so you can add a necklace cord. Make another hole in the side of the plastic gem -- the cord will go through both holes and help hold the back on.

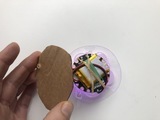

Place the Circuit Playground into the gem and place the back on. Use some scotch tape on the opposite side from the hole to hold it in place. Thread a necklace cord or string through the holes in the cardboard and the plastic. Now you have a wearable gem!
Tilt your gem left and right. It's easy to open it up and adjust the position of the Circuit Playground Express inside, if the tilt seems off. It works best if the Circuit Playground's USB port is pointing upwards inside the gem.


