Upload Images


Upload each of the layer files to Cricut Design space. Choose "simple," then on the next screen click any white space areas to turn them transparent. Click "continue," then choose "save as cut image" on the third screen.

Since I built my star layer from scratch in Illustrator, it didn't export with transparency. I could go back into Illustrator and mess around with the paths, but it's sometimes easier to just edit in the Cricut design space. Click each star to turn it transparent.

Resize Images

I like to change the color from black to something else to make my layers easier to see. You can do this with the color selector in the toolbar. I left one layer black: the very front frame image. Since I'm cutting it in a different color, I'll leave it a different color in Design Space.
Next, select all your layers and go to Align > Center. We need to resize them to fit our dimensions and this is easiest if we resize them all at once. If they aren't perfectly aligned, we'll get inaccurate measurements so don't skip this step.

Find the front frame layer. Resize this layer to the first measurement you took: the full width of the inside frame. You may need to click the lock icon to adjust both height and width to be just right.

Hide the frame layer for now, and select ALL the remaining layers at once. Resize them to match your second measurement: the size of the inside frame with the NeoPixels in place.
Add MagTag Window
Once your layers are perfectly sized, we'll add a window for the MagTag. It's better to do this in Design Space rather than earlier in the design process, because the MagTag screen window always needs to be 2.7" x 1.1" no matter what size your shadow box frame is. Adding it in Design Space gives you the ability to resize your design without resizing the MagTag window.

Drag a rectangle from the shape tool into your workspace. Resize it so it's 2.7" wide and 1.1" high. Align it with your design, not too close to the edge. Remember the MagTag board itself is larger than the screen area we want to show, so make sure the whole board will fit.


My window is already placed in a transparent / cut out area for my front 4 layers, so I only need to cut the window into my back 2 layers. You can hide the other layers to keep from getting confused.
Select both the window and the first layer you want to cut and click on the "slice" tool. Repeat with any other layers you want to cut through - you have to do them one at a time.
Delete the original rectangle and any other "artifact" layers that result.
Custom Material Settings

Next, we'll prepare our material settings. I couldn't find the perfect pre-programmed setting for this material so after a bunch of experimentation, I made my own.
Inside the menu at the upper left corner you'll find a link for "Manage Custom Materials". Set up a new material called "Laminated Paper" and choose "Fine Point Blade", set the pressure to 350, and choose 5x passes. Then click the star icon next to your new material to add it to your "favorites" list, so it's easy to find later on.
Make It
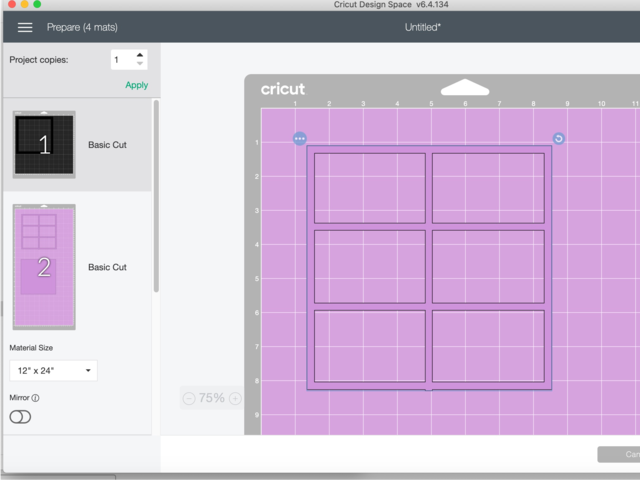
Make sure all the layers you want to cut are visible. Click the "Make It" button.
Since my frame layer is a different color than my other layers, it prints on its own mat. How convenient!
It's very important to remember to click "edit" for each of the layers and align the designs so they line up with your actual material. The laminated paper has a bit of clear laminate along the edges. I don't want that part in my design so I dragged each layer in toward the middle of the mat just a bit so it cuts only from the white paper in the center of my material.


