On single-core Raspberry Pi boards like the Model A+ and Pi Zero, emulation speed is sometimes less than stellar…the screen may update like molasses, or sound may be choppy. Let’s look at some ideas to fight back…
All of these methods require a USB keyboard attached.
The directions shown here are for RetroPie 4.1, but the same general ideas apply to other versions and possibly even other emulation packages, the steps will just be different.
Overclocking
Most Raspberry Pi boards can handle some overclocking — running the processor slightly faster than its “official” speed. Too fast though, and the system can become unstable and crash. Due to manufacturing variances, every single board is slightly different in this regard…you’ll need to do some experimentation to find the fastest reliable setting for your specific board. Restart after making any changes and try running some games for several minutes to really put the system through its paces.


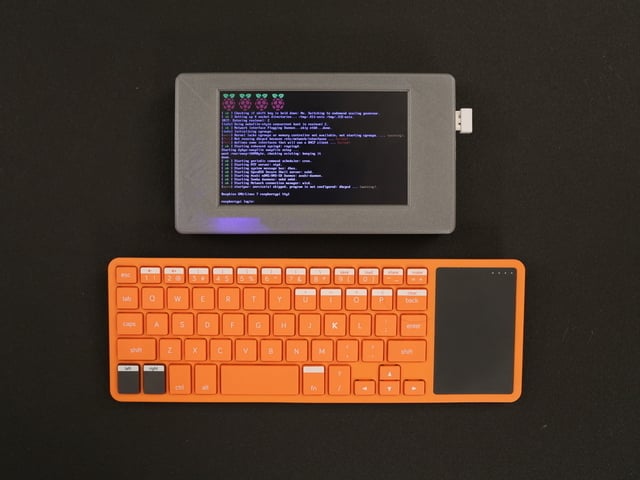
You can access the raspi-config utility from the RetroPie configuration screen, or press “F4” to exit to a command line and run “sudo raspi-config” manually.
raspi-config is keyboard-based, mostly using the arrows and enter keys; arcade controls, if connected, probably won’t have the intended effect.
Different Pi models offer different overlock settings. On the Model B+ being tested here, the “Medium” setting seems quite reliable. Other board types may overclock automatically and there’s nothing to adjust here.
If you’re using a PiTFT display, the “core” frequency setting should not exceed 300 MHz; the display will glitch and may not work at all. So avoid the higher overclock settings if using one of these screens, or manually edit the file /boot/config.txt to fine-tune various system frequencies individually.


When launching a game, there’s a brief moment when it’s possible to access some launch options…
When you see this “launching” screen, press the space bar (or any other key that generates an actual keycode…not a “meta” key like shift or control).
This brings up a menu…similar to raspi-config, it operates with the keyboard, not arcade buttons.
The first option lets you select an alternate emulator program (if available). For example, RetroPie 4.1 includes two different NES emulators: lr-fceumm (the default) and lr-nestopia. Different emulators make tradeoffs with regard to performance and “accuracy” of the emulation. Try an alternative and see how it performs (use the “Launch” option).
The selection you make will “stick” — it is not necessary to use this menu every time, unless you want to switch back to the original emulator choice. There’s also an option to use an alternate emulator only for specific ROMs, if you have different needs for different games.
The above steps are fairly quick and easy. If they meet your needs, consider the job done! If it’s still not quite the performance you need, the situation gets more involved…
These next steps require a network connection. On a Model A+ or Pi Zero, that usually requires a USB hub and an Ethernet or WiFi adapter, along with some configuration (the RetroPie 4.1 configuration menu includes WiFi setup). Alternately, if you have a spare Model B+ around, that’s easy to get on an Ethernet network…move the SD card over there for setup, then move it back to the target system when done.


Some “bleeding edge” emulators might offer better performance than the stock options provided by RetroPie. As with the “Alternate Emulators” above, it sometimes comes with a tradeoff in accuracy (hence their non-inclusion), so you’ll need to experiment and decide if it’s worth it.
From the RetroPie configuration screen, select “RetroPie Setup,” which switches to another of these keyboard-based menus.
Select “Manage packages,” then either “Manage optional packages” or “Manage experimental packages.” You’ll get a list of various emulators and/or games that aren’t normally installed by default. lr-quicknes was an optional package for NES emulation…it’s faster than the others…too fast, in fact, so I ended up not using it…but that’s all part of the experimentation process.
Choose the “Install from binary” option to install the selected package. Don’t bother with the “source” option…it’s very time consuming and usually provides no benefit.
Updating Emulators to Latest Versions
Sometimes you just need the newest-and-shiniest version of an installed emulator to provide the best available performance…


From the RetroPie configuration screen, select “RetroPie Setup.” This brings up the keyboard-driven menu again. Choose the “Update all installed packages” option to make a sweep through the system that’ll update everything to the latest release, including the kernel.
This system-wide update can be extremely time-consuming…possibly an hour or so, depending on processor and network speeds.
Even the default lr-fceumm on a non-overclocked Pi ran great after updating!
If using a PiTFT display, think twice before trying this option. Perhaps make a backup of your SD card first. Kernel updates have been known to break PiTFT support in some circumstances, and you’d have to start all over.