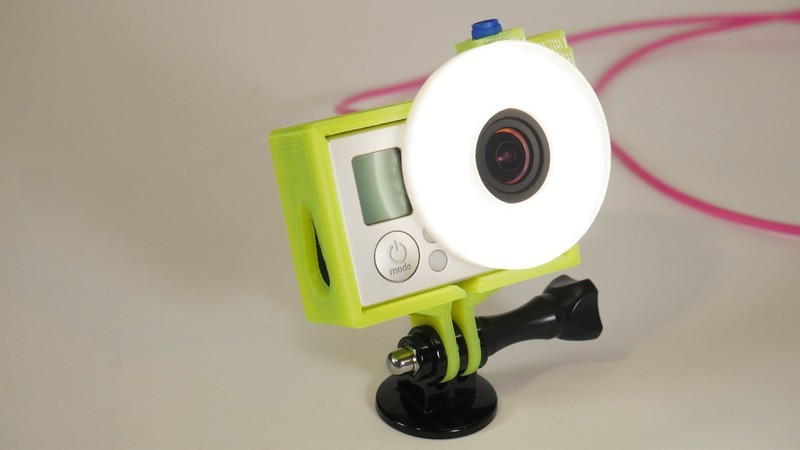
GoPros and other small action cams are great for project documentation because they can capture interesting angles without getting in the way of your build. You may not always have optimal lighting in your workspace though, which is where a lens mounted light can come in handy.
All of the code and hardware is running off of a Trinket M0 board using the Arduino IDE or CircuitPython depending on your preference. A NeoPixel 16 x RGBW ring is used for the light since it fits perfectly around the lens with some breathing room. This particular temperature of white (~4500K) looks very natural on camera and doesn’t give off a blue hue. A potentiometer is also in the circuit to adjust the brightness of the light. All of the components fit snuggly into a 3D printed case that fits over the GoPro’s lens.
This light’s housing is designed to fit with the GoPro Hero 3+ which is a slightly older model, but the file can be edited to fit other models or even different types of action cams.
For this project you'll need:


