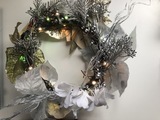
It's time to get crafty. I went to my local craft store and got a garland with some bells and twigs and leaves on it. I wound it around a large foam wig head fairly loosely -- it's easy to squish the crown and make it smaller to fit, but making it bigger is tough so leave yourself some room.
Wind the garland around on itself until you have a base crown.
Position your Gemma at the back of your crown. Wind the LED strand around and around, ending up with the lights as evenly spaced as possible around the crown.
Ideally you'll come to the end of the strand when you've circled around to the Gemma again. It's best to try and position most of the lights so they're facing up or outwards. The ones facing inwards towards your head will get lost.
I added a large clear gemstone fro the craft store to the front center of the crown. I positioned one of my lights directly behind it at the top and hot glued it in place so that it illuminates the whole jewel. Then, I glued a smaller silver-backed jewel right over where the light shone through, to help reflect and diffuse the light.
Use floral wire to attach lots of texture. Large flowers, small flowers, silvery branches, bells, antlers, or whatever catches your eye. There is an entire aisle full of this stuff at most craft stores around the holiday season. More is more. Go nuts.
Wrap a rubber band around your battery pack and your Gemma to attach it to the back of the crown, hidden among the flowers. If you're using the on/off switch JST extender, hide it in there too. Be sure you can access the battery connector for charging.
Finish up by gluing jewels, snowflakes, glitter and anything fancy you can find in your crafting drawer. Make it special! Make it yours. Brighten up everyone's day whenever you wear it.


