
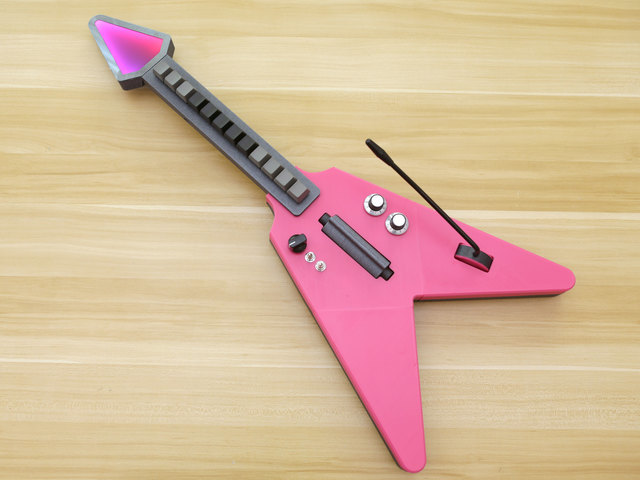
Inspired by the infamous Guitar Hero controller, this project shapes a MIDI controller into a 3D printed guitar. Featuring 12x Cherry MX switches in the neck, this gives you a tactile "hands-on" feeling that is satisfying. The whammy bar lets you pitch bend, making it feel like an electric guitar. It also features a strumming mode so you can power through chords and notes, giving you a playing style unlike typical MIDI controllers. Using an accelerometer, you can move the guitar to adjust modulation giving you an expressive playing style.
This project is coded in CircuitPython and uses the USB MIDI library. It features velocity, modulation, pitch bending and notes on/off. It features 8 different sets of notes for playing different octaves or sets of notes to craft your own chords. Two switches allow you to enable different features such the strum mode, trigger mode and accelerometer mode. Two potentiometers lets you adjust velocity and modulation.

The parts are 3D printed without any support material. The top and bottom half of the guitar body snap fit together allowing you easy access to open and close. Parts are designed to print on most 3D printers with a build volume of 250x210x200mm. The parts and components are secured together with M3 hardware. The design files are open source, freely available to download. The CAD files feature a parametric assembly to easily add/mod to create custom controller.

MX switches are available in different types and styles. The color of the key stem is used to classify its characteristics. We choose to use speed silvers for their quiet presses and low actuation point.
The head houses a strip of NeoPixels to diffuse a piece of black LED acrylic. The LEDs illuminate the panel making a neat lighting effect.


Parts Galore!
There's a hand full of parts used in this project! If you have parts on-hand, be sure to scroll through the guide and look for anything that you may have on hand. Most of the panel mounted components feature standardized diameters. The mounting holes on the Grand Central M4 board are similar to the Arduino Mega.

Parts from Adafruit
Wires & Connections
Because of the amount of components, several dozens of connections will need to be made. By using pre-crimped wires with JST PH connectors, you'll make the assembly more manageable.
Hardware List

Guitar Body – Bottom Half
- 16x M3 x 6mm pan head screws
- 4x M3 x 8mm pan head screws
- 4x M3 x 10mm pan head screws
- 4x M3 x 16mm pan head screws
- 20x M3 hex nuts
- 4x M3 x 20mm standoffs
- 1x Extension Spring (6.35 x 22.2 mm)
Guitar Body – Top Half
- 7x M3 x 6mm pan head screws
- 7x M3 hex nuts
Guitar Neck
- 12x M2.5 hex nuts
- 6x M2.5 x 8mm pan head screws
- 2x M3 x 6mm pan head screws
- 2x M3 hex nuts


