
The sides/rear and front panel drilling guides will be attached to the plastic enclosure using a washable glue stick. Many office supply glue sticks are water-soluble, but one that's clearly labeled as washable is recommended. The one shown is a quick-dry formulation. If you're a beginning enclosure fabricator, then you may prefer to use the slower drying variant to give you more time to position the drilling guides. It's very nostalgic to get to use school paste in a project!

- Attach the front cover with the screws supplied with the enclosure. Don't over tighten the screws. Snug is good enough for now. The enclosure is stronger with the front cover in place, making it more stable and easier to drill.

- Apply a thin coat of glue to the four sides and the rear panel (the one without the mounting screws).

- With the rear panel facing upwards, slide the sides/rear panel guide into place. Carefully align it and square it up with the enclosure, then press it into place with your fingers.

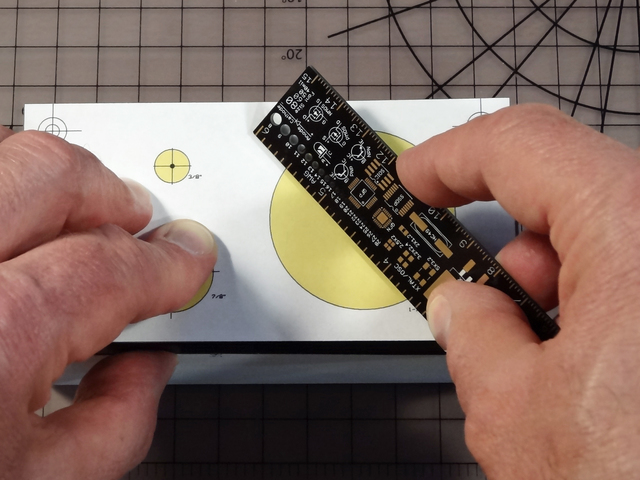
- Using the edge of a ruler, gently burnish each guide surface to secure the guide to the enclosure. Don't be too enthusiastic in this step. We don't want to scrape off the printing!


- The large yellow filter hole of the front panel guide should be directly above the large fan hole of the rear panel guide.
- Align the front panel guide with the edges of the front panel and press into place.

- Tape down the edges of both guides to completely secure them to the enclosure. Blue painters' tape works well for this step.
- When taping, don't cover any holes that need to be drilled-- makes 'em tough to find!

- After taping the guides, the overall enclosure should look like this (rear panel view). The tape is holding down all the guide edges but is not covering the acrylic rod holes on each of the two larger sides.
Allow at least 15 minutes for the glue to set before moving on to the next step.

- Use a small, sharp center punch to create an indentation in the exact center of each hole. The indentation will help to guide the pilot drill in the next step. The holes to be drilled are yellow circles with a small black dot in the center.
- A manual or automatic center punch can be used in this step. The photo shows the use of an automatic center punch adjusted to a low impact setting, perfect for soft plastics.
We're ready to drill some holes now, so off to the workshop we go!


