Adafruit CircuitPython Module Install
To use the Charlieplex display with your Adafruit CircuitPython board you'll need to install the Adafruit_CircuitPython_IS31FL3731 module on your board. Remember this module is for Adafruit CircuitPython firmware and not MicroPython.org firmware!
First make sure you are running the latest version of Adafruit CircuitPython for your board. Next you'll need to install the necessary libraries to use the hardware--read below and carefully follow the referenced steps to find and install these libraries from Adafruit's CircuitPython library bundle.
Bundle Install
For express boards that have extra flash storage, like the Feather/Metro M0 express and Circuit Playground express, you can easily install the necessary libraries with Adafruit's CircuitPython bundle. This is an all-in-one package that includes the necessary libraries to use the IS31FL3731 Charlieplex driver with CircuitPython. To install the bundle follow the steps in your board's guide, like these steps for the Feather M0 express board.
Remember for non-express boards like the Trinket M0, Gemma M0, and Feather/Metro M0 basic you'll need to manually install the necessary libraries from the bundle:
- adafruit_is31fl3731.mpy
If your board supports USB mass storage, like the M0-based boards, then simply drag the files to the board's file system. Note on boards without external SPI flash, like a Feather M0 or Trinket/Gemma M0, you might run into issues on Mac OSX with hidden files taking up too much space when drag and drop copying, see this page for a workaround.
If your board doesn't support USB mass storage, like the ESP8266, then use a tool like ampy to copy the file to the board. You can use the latest version of ampy and its new directory copy command to easily move module directories to the board.
Before continuing make sure your board's lib folder or root filesystem has the adafruit_is31fl3731.mpy module copied over.

Usage
The following section will show how to control the Charlieplex display from the board's Python prompt / REPL. You'll learn how to interactively control the display, turn on/off LEDs, control brightness and more by typing in the code below.
First connect to the board's serial REPL so you are at the CircuitPython >>> prompt.
I2C Initialization
First you'll need to initialize the I2C bus for your board. First import the necessary modules:
import board
import busio as io
Note if you're using the ESP8266 or other boards which do not support hardware I2C you need to import from the bitbangio module instead of busio:
import board
import bitbangio as io
Now for either board run this command to create the I2C instance using the default SCL and SDA pins (which will be marked on the boards pins if using a Feather or similar Adafruit board):
i2c = io.I2C(board.SCL, board.SDA)
Charlieplex Usage
Once I2C is initialized you're ready to import and use the Charlieplex module. First import the adafruit_is31fl3731 module by running:
import adafruit_is31fl3731
Next depending on what display you're using you can create an instance of a Charlieplex display class:
- Matrix - This class represents the 16 x 9 LED grid matrix used by the Charlieplex driver breakout.
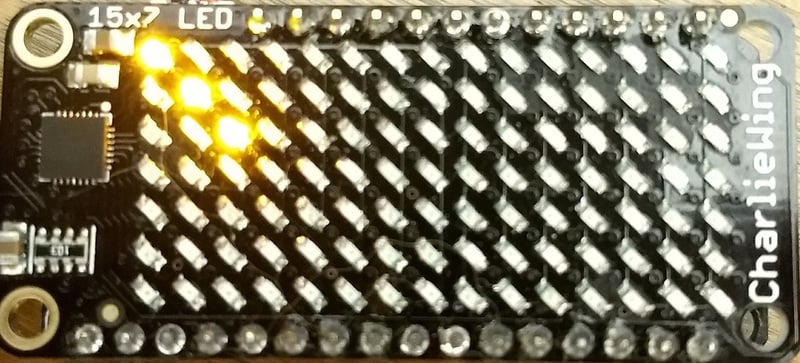
- CharlieWing - This class represents the 15 x 7 LED Charlieplex FeatherWing.
For example to use the CharlieWing you can run:
display = adafruit_is31fl3731.CharlieWing(i2c)
Note that you need to pass the I2C bus created above into the initializer for the class.
Alternatively you can use the Charlieplex driver & matrix breakout by running:
display = adafruit_is31fl3731.Matrix(i2c)
If you've changed the I2C address of the Charlieplex driver you can specify it with an optional address keyword parameter too. For example if the driver has an I2C address of 0x77 you can run:
display = adafruit_is31fl3731.Matrix(i2c, address=0x77)
The address parameter can be used with the CharlieWing class too.
When the display initializes it will go through and clear each frame (there are 8 frames total) of the display. You might see the display momentarily flash and then turn off to a clear no pixel lit image.
You can control all of the board's pixels using the fill function. Send to this function a value from 0 to 255 where 0 is every LED pixel turned off and 255 is every LED pixel turned on to maximum brightness. For example to set all the pixels to half their brightness run:
display.fill(127)

You might notice some buzzing or ringing sounds from the display when all pixels are lit, this is normal as the Charlieplex driver quickly switches LEDs on and off.
If you've used other displays like LED matrices you might notice the Charlieplex module doesn't need to have a show function called to make the changes visible. As soon as you call fill or other display functions the display will update!
You can turn all the pixels off by filling them with color 0:
display.fill(0)

Now for some fun! You can set any of the LED pixels using the pixel function. This function takes the following parameters:
- X position - The location of the horizontal / X pixel position.
- Y position - The location of the vertical / Y pixel position.
- Intensity - This is a value from 0 to 255 which specifies how bright the pixel should be, 0 is off and 255 is maximum brightness. Use an in-between value to show a less bright pixel.
For example to set pixel 0, 0 to full brightness run:
display.pixel(0, 0, 255)

Or to set the pixel next to it horizontally to half brightness run:
display.pixel(1, 0, 127)

You can turn off individual pixels by setting them to an intensity of zero.
You can even make pixels blink! The board supports a fixed blink rate that you set using the blink function. This function takes in the number of milliseconds to use for the blink rate (but internally it can only blink in 270ms increments so you might not get an exact match). For example to blink pixels about once every half second call:
display.blink(500)
You'll notice nothing actually changes on the board. This is because in addition to intensity each LED pixel has a blink state which can be enabled and disabled. The fill command can actually set all pixels and turn them on to blink:
display.fill(127, blink=True)
You can turn off the blinking by setting blink=False.
The pixel command supports the blink parameter too! You can turn on and off blinking pixel by pixel as needed. For example to turn on blinking for pixel 0, 0:
display.pixel(0, 0, 127, blink=True)
Currently the Charlieplex module is very simple and only exposes pixel set commands. In the future more advanced graphics commands like line drawing, text display, etc. might be implemented but for now you'll need to manipulate the pixels yourself.
Finally the display supports holding up to 8 frames of pixel data. Each frame contains an entire matrix of LED pixel state (intensity, blinking, etc.) and by default the module starts you on frame 0. You can change to start displaying and drawing on another frame by calling frame which takes these parameters:
- Frame number - This is the frame number to make the active frame for display or drawing. There are 8 frames total, 0 through 7.
- Show - An optional boolean that defaults to True and specifies if the frame should be immediately displayed (True) or just made active so that pixel and fill commands draw on it but it's not yet shown.
For example to clear frame 1 and draw a few pixels on it, then display it you can run:
display.frame(1, show=False)
display.fill(0)
display.pixel(0, 0, 255)
display.pixel(1, 1, 255)
display.pixel(2, 2, 255)
display.frame(1)  # show=True is the default, the frame will be displayed!
Notice how the first call switches to make frame 1 the active frame but doesn't display it because show is set to false. Then the frame pixel data is changed with fill and pixel commands, and finally the frame is shown by calling frame again but letting the default show = True be used so the frame is displayed.
Using frames you can build simple animations by drawing each frame and swapping between them over time!
That's all there is to the basic Charlieplex driver module usage! Be sure to see the module documentation for more details on advanced usage.
Full Example
Here's a complete example that randomly turns on LEDs for the Charlieplex FeatherWing. This is good to review all the steps of setting up the display and drawing pixels. You can read the comments to learn more about the random number generation functions in CircuitPython and MicroPython's random module too. Save this file as a main.py on your board's root file system and watch it randomly turn on LEDs to different intensity values.
# Charlieplex FeatherWing random pixel drawing demo.
# Author: Tony DiCola
# License: Public Domain

# Import necessary libraries:
import board
# If using an M0 board with hardware I2C use this line:
import busio as io
# If using the ESP8266 with software I2C use this line instead:
#import bitbangio as io
import random
import time

import adafruit_is31fl3731


# Initialize I2C bus:
i2c = io.I2C(board.SCL, board.SDA)

# Create the FeatherWing display:
display = adafruit_is31fl3731.CharlieWing(i2c)

# Turn off all the pixels.
display.fill(0)

# Main loop forever turning on/off random pixels and delaying for random amounts
# of time.
while True:
    # Generate random X, Y coordinates within the FeatherWing display bounds.
    x = random.randrange(0, 16)  # randrange generates a random number within
    y = random.randrange(0, 8)   # the first parameter and up to but not
                                 # including the second parameter.
    # Generate a random intensity within the range of 0 to 192:
    intensity = random.randrange(0, 193)
    # Set the pixel.
    display.pixel(x, y, intensity)
    # Delay for a random small period of time.  The uniform function
    # generates a floating point value (i.e. fractional) within the specified
    # range (inclusive for first parameter, exclusive for second).
    # Sleep for a short ~10 to 100 millisecond period of time.
    time.sleep(random.uniform(0.01, 0.1))


