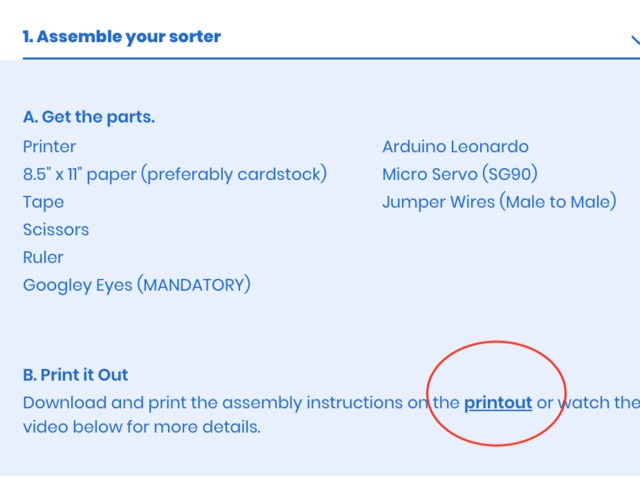
Visit and print out the page linked here from the Google project site. Click the printout to download the pdf, then print it.


- Cut out the two foldings.
- For the smaller piece, you may want to consider using a hobby knife for more precision.
Please be careful with scissors or hobby knives. Adults should help younger makers with cutting items.


- Use a ruler to fold and crease along each dotted line.
- Tape/glue together each corresponding letter.
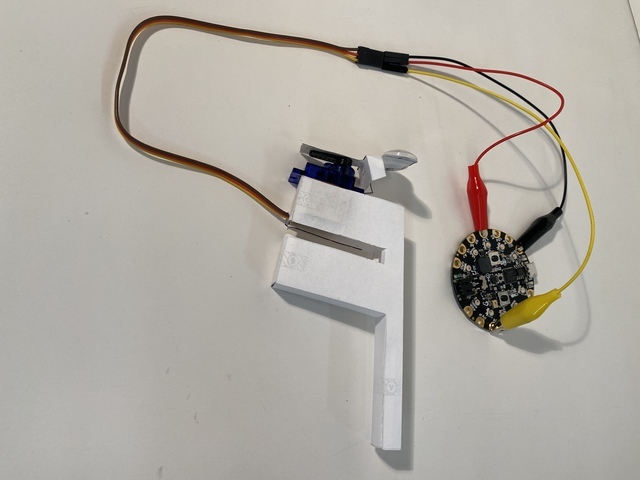
- Tape/glue the servo to the larger piece.
- Tape/glue the servo arm to the smaller piece. Add the googly eyes!
- Then the servo arm goes back on the servo.
*For more detailed visuals on the folding and taping of these parts, check out the videos in part 1C in Google's guide.
If you'd like to 3D print your sorter skip ahead to the "3D Printing" section to find out how!