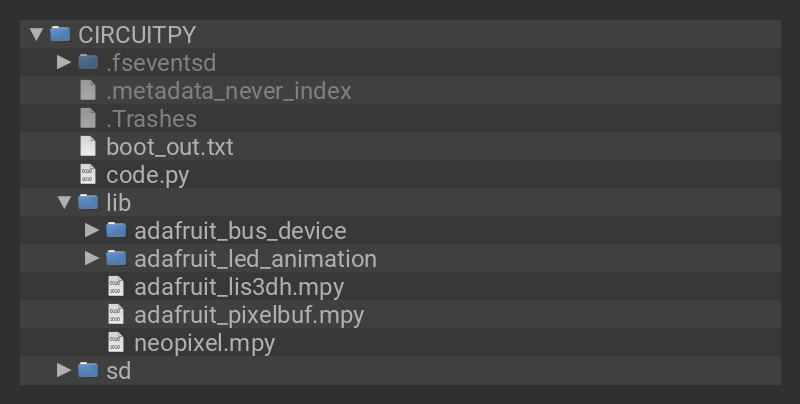
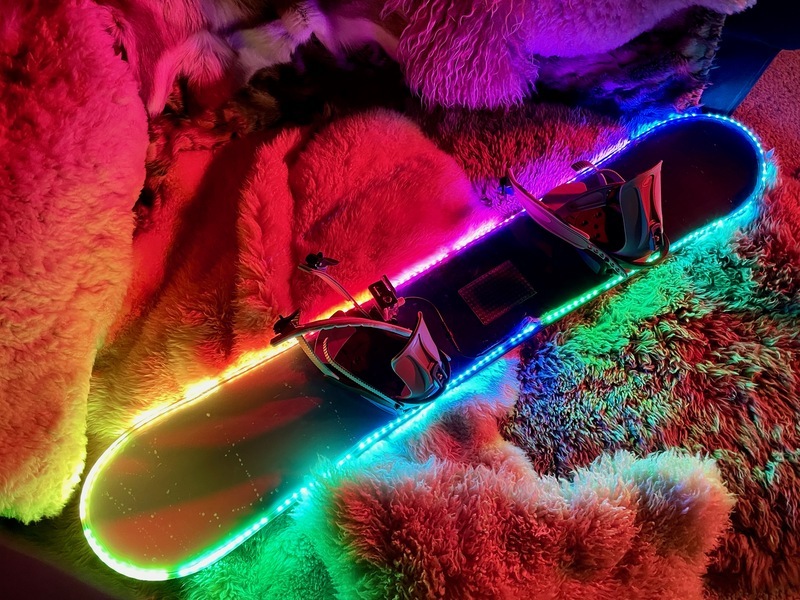
Shred down the slopes this season with your own custom motion-reactive LED snowboard. This tutorial includes CircuitPython sample code with 8 different layered LED animation modes, plus a motion-sensitive carving mode that lights your active edge as you carve down the mountain. 

Learn to protect your electronics from the elements using waterproof enclosures and connectors. Make your board robust enough that you can ride all night long. 

Parts Needed

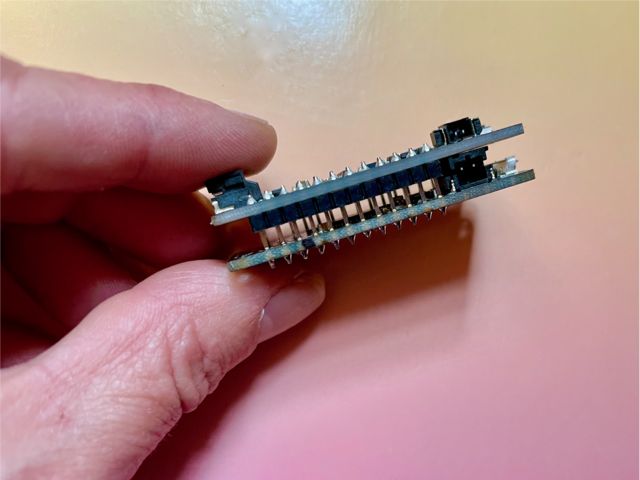
The Adafruit Feather M4 Express paired with the Prop-Maker Wing is a really powerful combo. The Prop-Maker wing is designed just for projects like this. It has an onboard NeoPixel connector, an Lis3dh accelerometer, level-shifting, and plenty of pins to add whatever functionality you desire. It also has onboard battery charging, so it's easy to charge up your board for maximum glowing enjoyment.

Angled shot of a Adafruit Feather M4 Express.
It's what you've been waiting for, the Feather M4 Express featuring ATSAMD51. This Feather is fast like a swift, smart like an owl, strong like a ox-bird (it's half ox,...
$22.95
In Stock
Angled shot of a Adafruit Prop-Maker FeatherWing.
The Adafruit Feather series gives you lots of options for a small, portable, rechargeable microcontroller board. Perfect for fitting into your next prop build! This FeatherWing will...
$9.95
In Stock

This build uses 60/m Skinny NeoPixels, mounted on their side so they shine outwards and illuminate the snow as you ride. Also get a 3-pin JST connector to plug into the Prop-Maker Wing.

Adafruit NeoPixel Digital RGB LED Strip with all the LEDs lighting in a rainbow pattern.
So thin. So mini. So teeeeeeny-tiny. It's the 'skinny' version of our classic NeoPixel strips!These NeoPixel strips have 60 digitally-addressable pixel Mini LEDs per...
Out of Stock
1 x 3-pin Connector
JST PH 3-pin Plug-Plug Cable - 100mm long

You'll also need an on/off switch, a momentary switch for changing between modes, a battery, and a waterproof connector.

We'll be using a GoPro camera case as our electronics enclosure. It's a fully waterproof / submersible enclosure that already has waterproof buttons we can repurpose to our hearts' content. Grab a PG-7 cable gland to safely pass the NeoPixel wires through the case.

1 x On/Off Power Button
On/Off Power Button / Push Button Toggle Switch
1 x Momentary Switch
Tactile Switch Buttons (12mm square, 6mm tall)
1 x Cable Gland
Cable Gland PG-7 size - 0.118" to 0.169" Cable Diameter - PG-7
1 x Battery
Lithium Ion Battery - 3.7v 2000mAh
2 x Weatherproof Connector
Waterproof Polarized 4-Wire Cable Set

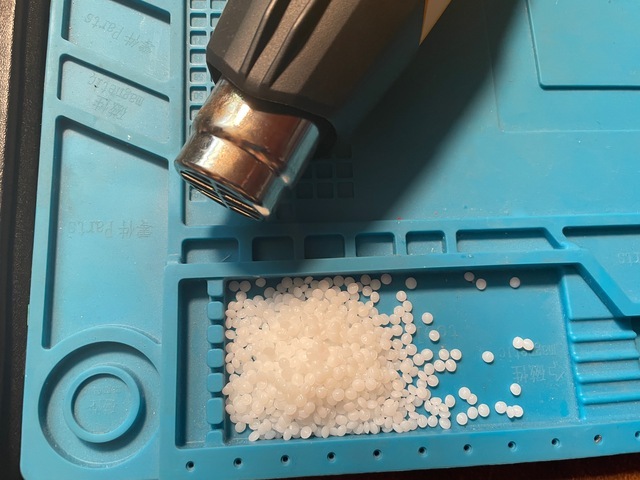
To secure the electronics and buttons inside our case, we'll use moldable Thermoplastic. This stuff is great - just get it warm enough to melt, shape it however you'd like, and let it cool in place. Re-melt as needed until you get it just right.

White hand holding a blob of melted Low Temperature Thermoplastic.
They look a lot like sushi rice, but don't eat 'em - these are Low Temperature Thermoplastic Beads! Also known as "Friendly Plastic",...
$4.95
In Stock

Also stock up on some large-sized heat shrink tubing. This stuff is invaluable for making good waterproof connections.

1 x Heat Shrink
Food-Grade Heat Shrink - 3/8" diameter 12" long

You'll Also Need

The Prop-Maker FeatherWing stacks on top of the Feather M4 express using the included headers. More about Feather and FeatherWing assembly can be found in the How to Solder Headers guide.

The GoPro case is just barely big enough to fit all our components, so we'll stack the FeatherWing directly on top of the Feather to make as small a package as possible. 

The NeoPixel strip plugs into the port on the Prop-Maker Wing. We'll connect power and ground to both ends of the strip for a balanced distribution of power, and connect the data wire to the data IN end of the NeoPixel strip. Watch the arrows printed on the strip to be sure you're connecting to the correct end.

We'll use the G and EN pins on the FeatherWing for our on/off switch, and hook our momentary mode-change button up to G and A1.

There are a few steps required to get your Feather M4 board ready to light your snowboard:

  1. Update to the newest version of the CircuitPython operating system, so your board appears as a drive on your computer called CIRCUITPY
  2. Download and install a few libraries into the /lib folder on your CIRCUITPY drive
  3. Download and customize the code using the Mu editor (or another text editor), so the pixel setup lays out correctly on your snowboard
  4. Save the code as a file called code.py at the root of your CIRCUITPY drive

CircuitPython is a derivative of MicroPython designed to simplify experimentation and education on low-cost microcontrollers. It makes it easier than ever to get prototyping by requiring no upfront desktop software downloads. Simply copy and edit files on the CIRCUITPY drive to iterate.

The following instructions will show you how to install CircuitPython. If you've already installed CircuitPython but are looking to update it or reinstall it, the same steps work for that as well!

Set up CircuitPython Quick Start!

Follow this quick step-by-step for super-fast Python power :)

Click the link above and download the latest UF2 file.

Download and save it to your desktop (or wherever is handy).

Plug your Feather M4 into your computer using a known-good USB cable.

A lot of people end up using charge-only USB cables and it is very frustrating! So make sure you have a USB cable you know is good for data sync.

Double-click the Reset button next to the USB connector on your board, and you will see the NeoPixel RGB LED turn green. If it turns red, check the USB cable, try another USB port, etc. Note: The little red LED next to the USB connector will pulse red. That's ok!

If double-clicking doesn't work the first time, try again. Sometimes it can take a few tries to get the rhythm right!

You will see a new disk drive appear called FEATHERBOOT.


Drag the adafruit_circuitpython_etc.uf2 file to FEATHERBOOT.

The LED will flash. Then, the FEATHERBOOT drive will disappear and a new disk drive called CIRCUITPY will appear.

That's it, you're done! :)

Further Information

For more detailed info on installing CircuitPython, check out Installing CircuitPython.

Take your Feather and plug it into your computer via a known good data + power USB cable. Your operating system will show a drive named CIRCUITPY when a board is plugged in. If you get a drive named FEATHERBOOT you'll likely need to install CircuitPython.

Install Libraries

To use with CircuitPython, you need to first install a few libraries, into the lib folder on your CIRCUITPY drive. Then you need to update code.py with the example script.

Thankfully, we can do this in one go. In the example below, click the Download Project Bundle button below to download the necessary libraries and the code.py file in a zip file. Extract the contents of the zip file, open the directory LED_Snowboard/ and then click on the directory that matches the version of CircuitPython you're using and copy the contents of that directory to your CIRCUITPY drive.

Your CIRCUITPY drive should now look similar to the following image:

CIRCUITPY

Download Feather M4 Code from GitHub

# SPDX-FileCopyrightText: 2021 Erin St Blaine for Adafruit Industries
# SPDX-FileCopyrightText: 2021 Limor Fried for Adafruit Industries
#
# SPDX-License-Identifier: MIT

"""
LED Snowboard with Feather M4 and PropMaker Wing
Adafruit invests time and resources providing this open source code.
Please support Adafruit and open source hardware by purchasing
products from Adafruit!
Written by Erin St Blaine & Limor Fried for Adafruit Industries
Copyright (c) 2020-2021 Adafruit Industries
Licensed under the MIT license.
All text above must be included in any redistribution.


"""
# pylint: disable=import-error
# pylint: disable=no-member
import time
import board
import digitalio
from digitalio import DigitalInOut, Direction, Pull
from rainbowio import colorwheel
import adafruit_lis3dh
import neopixel
from adafruit_led_animation.helper import PixelMap
from adafruit_led_animation.sequence import AnimationSequence
from adafruit_led_animation.group import AnimationGroup
from adafruit_led_animation.animation.sparkle import Sparkle
from adafruit_led_animation.animation.rainbow import Rainbow
from adafruit_led_animation.animation.rainbowchase import RainbowChase
from adafruit_led_animation.animation.rainbowcomet import RainbowComet
from adafruit_led_animation.animation.solid import Solid
from adafruit_led_animation.animation.chase import Chase
from adafruit_led_animation.animation.comet import Comet
from adafruit_led_animation.color import (
    BLACK,
    RED,
    GREEN,
    ORANGE,
    BLUE,
    PURPLE,
    WHITE,
)

btn = DigitalInOut(board.A1)
btn.direction = Direction.INPUT
btn.pull = Pull.UP

prev_state = btn.value

THRESHOLD = -1 #shake threshold
CARVE_THRESHOLD = 5

# Set to the length in seconds for the animations
POWER_ON_DURATION = 2

NUM_PIXELS = 211  # Number of pixels used in project
NEOPIXEL_PIN = board.D5
POWER_PIN = board.D10

enable = digitalio.DigitalInOut(POWER_PIN)
enable.direction = digitalio.Direction.OUTPUT
enable.value = False


# Set up accelerometer on I2C bus, 4G range:
i2c = board.I2C()  # uses board.SCL and board.SDA
# i2c = board.STEMMA_I2C()  # For using the built-in STEMMA QT connector on a microcontroller
accel = adafruit_lis3dh.LIS3DH_I2C(i2c)
accel.range = adafruit_lis3dh.RANGE_4_G
accel.set_tap(2, 15)

pixels = neopixel.NeoPixel(NEOPIXEL_PIN, NUM_PIXELS, brightness=1, auto_write=False)
pixels.fill(0)  # NeoPixels off ASAP on startup
pixels.show()


#PIXEL MAPS: Used for reordering pixels so the animations can run in different configurations.
#My LED strips inside the neck are accidentally swapped left-right,
#so these maps also correct for that


#Bottom up along both sides at once
pixel_map_right = PixelMap(pixels, [
    150, 151, 152, 149, 148, 147, 146, 145, 144, 143, 142,
    141, 140, 139, 138, 137, 136, 135, 134, 133, 132, 131,
    130, 129, 128, 127, 126, 125, 124, 123, 122, 121, 120,
    119, 118, 117, 116, 115, 114, 113, 112, 111, 110, 109,
    108, 107, 106, 105, 104, 103, 102, 101, 100, 99, 98, 97,
    96, 95, 94, 93, 92, 91, 90, 89, 88, 87, 86, 85, 84, 83,
    82, 81, 80, 79, 78, 77, 76, 75, 74, 73, 72, 71, 70, 69,
    68, 67, 66, 65, 64, 63, 62, 61, 60, 59, 58, 57, 56, 55,
    54, 53, 52, 51, 50, 49, 48, 47, 46,
    ], individual_pixels=True)

#Starts at the bottom and goes around clockwise
pixel_map_left = PixelMap(pixels, [
    153, 154, 155, 156, 157, 158, 159, 160, 161, 162, 163, 164,
    165, 166, 167, 168, 169, 170, 171, 172, 173, 174, 175, 176,
    177, 178, 179, 180, 181, 182, 183, 184, 185, 186, 187, 188, 189,
    190, 191, 192, 193, 194, 195, 196, 197, 198, 199, 200, 201, 202,
    203, 204, 205, 206, 207, 208, 209, 210, 0, 1, 2, 3, 4, 5, 6, 7, 8, 9, 10,
    11, 12, 13, 14, 15, 16, 17, 18, 19, 20, 21, 22, 23, 24, 25, 26, 27, 28, 29,
    30, 31, 32, 33, 34, 35, 36, 37, 38, 39, 40, 41, 42, 43, 44, 45,
    ], individual_pixels=True)

#Radiates from the center outwards like a starburst
pixel_map_radiate = PixelMap(pixels, [
    206, 98, 205, 99, 207, 97, 204, 100, 208, 96, 203, 101, 209,
    95, 202, 102, 210, 94, 0, 93, 92, 201, 103, 1, 91, 200, 104,
    2, 90, 199, 105, 3, 89, 198, 106, 4, 88, 197, 107, 5, 87, 196,
    108, 6, 86, 195, 109, 7, 85, 194, 110, 8, 84, 193, 111, 9, 83,
    192, 112, 10, 82, 191, 113, 11, 81, 190, 114, 12, 80, 189, 115,
    13, 79, 188, 116, 14, 78, 187, 117, 15, 77, 186, 118, 16, 76, 185,
    119, 17, 75, 184, 120, 18, 74, 183, 121, 19, 73, 182, 122, 20, 72,
    181, 123, 21, 71, 180, 124, 22, 70, 179, 125, 23, 69, 178, 126, 24,
    68, 177, 127, 25, 67, 176, 128, 26, 66, 175, 129, 27, 65, 174, 130,
    28, 64, 173, 131, 29, 63, 172, 132, 30, 62, 171, 133, 31, 61, 170, 134, 32,
    60, 169, 135, 33, 69, 168, 136, 34, 58, 167, 137, 35, 57, 166, 138, 36, 56,
    165, 139, 37, 55, 164, 140, 38, 54, 163, 141, 39, 53, 162, 142, 40, 52, 161,
    143, 41, 51, 160, 144, 42, 50, 159, 145, 43, 49, 158, 146, 44, 48, 157, 147,
    45, 47, 156, 148, 46, 46, 155, 149, 47, 154, 149, 153, 150, 152, 151,
    ], individual_pixels=True)

#Top down along both sides at once
pixel_map_sweep = PixelMap(pixels, [
    151, 152, 150, 153, 149, 154, 148, 155, 147, 156, 146, 157, 145, 158,
    144, 159, 143, 160, 142, 161, 141, 162, 140, 163, 139, 164, 138, 165,
    137, 166, 136, 167, 135, 168, 134, 169, 133, 170, 132, 171, 131, 172,
    130, 173, 129, 174, 128, 175, 127, 176, 126, 177, 125, 178, 124, 179,
    123, 180, 122, 181, 121, 182, 120, 183, 119, 184, 118, 185, 117, 186,
    116, 187, 115, 188, 114, 189, 113, 190, 112, 191, 111, 192, 110, 193,
    109, 194, 108, 195, 107, 196, 106, 197, 105, 198, 104, 199, 103, 200,
    102, 201, 101, 202, 100, 203, 99, 204, 98, 205, 97, 206, 96, 207, 95,
    208, 94, 209, 93, 210, 92, 91, 0, 90, 1, 89, 2, 88, 3, 87, 4, 86, 5, 85,
    6, 84, 7, 83, 8, 82, 9, 81, 10, 80, 11, 79, 12, 78, 13, 77, 14, 76, 15,
    75, 16, 74, 17, 73, 18, 72, 19, 71, 20, 70, 21, 69, 22, 68, 23, 67, 24,
    66, 25, 65, 24, 64, 25, 63, 26, 62, 27, 61, 28, 60, 29, 59, 30, 58, 31,
    57, 32, 56, 33, 55, 34, 54, 35, 53, 36, 52, 37, 51, 38, 50, 39, 49, 40,
    48, 41, 47, 42, 46, 43, 45, 44,
    ], individual_pixels=True)

pixel_map_tail = PixelMap(pixels, [
    15, 75, 16, 74, 17, 73, 18, 72, 19, 71, 20, 70, 21, 69, 22, 68, 23, 67,
    24, 66, 25, 65, 24, 64, 25, 63, 26, 62, 27, 61, 28, 60, 29, 59, 30, 58,
    31, 57, 32, 56, 33, 55, 34, 54, 35, 53, 36, 52, 37, 51, 38, 50, 39, 49,
    40, 48, 41, 47, 42, 46, 43, 45, 44,
    ], individual_pixels=True)

pixel_map = [
    pixel_map_right,
    pixel_map_left,
    pixel_map_radiate,
    pixel_map_sweep,
    pixel_map_tail,
]


def power_on(duration):
    """
    Animate NeoPixels for power on.
    """
    start_time = time.monotonic()  # Save start time
    while True:
        elapsed = time.monotonic() - start_time  # Time spent
        if elapsed > duration:  # Past duration?
            break  # Stop animating
        powerup.animate()


# Cusomize LED Animations  ------------------------------------------------------
powerup = RainbowComet(pixel_map[3], speed=0, tail_length=25, bounce=False)
rainbow = Rainbow(pixel_map[2], speed=0, period=6, name="rainbow", step=2.4)
rainbow_chase = RainbowChase(pixels, speed=0, size=6, spacing=15, step=10)
rainbow_chase2 = RainbowChase(pixels, speed=0, size=10, spacing=1, step=18, name="rainbow_chase2")
chase = RainbowChase(pixel_map[3], speed=0, size=20, spacing=20)
chase2 = Chase(pixels, speed=0.1, color=ORANGE, size=6, spacing=6)
rainbow_comet = RainbowComet(pixel_map[2], speed=0, tail_length=200, bounce=True)
rainbow_comet2 = RainbowComet(
    pixels, speed=0, tail_length=104, colorwheel_offset=80, bounce=True
    )
rainbow_comet3 = RainbowComet(
    pixel_map[2], speed=0, tail_length=80, colorwheel_offset=80, step=4, bounce=False
    )
strum = RainbowComet(
    pixel_map[3], speed=0, tail_length=50, bounce=False, colorwheel_offset=50, step=4
    )
fuego = RainbowComet(
    pixel_map[4], speed=0.05, colorwheel_offset=40, step=2, tail_length=40
    )
fuego2 = RainbowComet(
    pixel_map[4], speed=0.02, colorwheel_offset=40, step=2, tail_length=40
    )
lava = Comet(pixel_map[4], speed=0, color=ORANGE, tail_length=40, bounce=False)
sparkle = Sparkle(pixel_map[3], speed=0.05, color=BLUE, num_sparkles=10)
sparkle2 = Sparkle(pixels, speed=0.05, color=PURPLE, num_sparkles=4)
sparkle3 = Sparkle(pixels, speed=0, color=WHITE, num_sparkles=1)
carve_left = Solid(pixel_map[0], color=GREEN)
carve_right = Solid(pixel_map[1], color=RED)
black_left = Solid(pixel_map[0], color=BLACK, name="BLACK")
black_right = Solid(pixel_map[1], color=BLACK)

# Animations Playlist - reorder as desired. AnimationGroups play at the same time
animations = AnimationSequence(
    AnimationGroup(
        fuego,
        fuego2,
        lava,
        sparkle,
        ),
    chase,
    rainbow_chase2,
    rainbow,
    AnimationGroup(
        rainbow_comet,
        sparkle3,
        ),
    AnimationGroup(
        rainbow_comet2,
        sparkle3,
        ),
    AnimationGroup(
        sparkle,
        strum,
        ),
    AnimationGroup(
        sparkle2,
        rainbow_comet3,
        ),
    AnimationGroup(
        black_left,
        black_right,
        ),
    black_left,
    auto_clear=True,
    auto_reset=True,
)


MODE = 0
LASTMODE = 1
i = 0

# Main loop
while True:
    i = (i + 0.5) % 256  # run from 0 to 255
    TILT_COLOR = colorwheel(i)
    if MODE == 0:  # If currently off...
        enable.value = True
        power_on(POWER_ON_DURATION)  # Power up!
        MODE = LASTMODE

    elif MODE >= 1:  # If not OFF MODE...
    # Read button
        cur_state = btn.value
        if cur_state != prev_state:
            if not cur_state:
                animations.next()
                print("BTN is down")
            else:
                print("BTN is up")
        prev_state = cur_state
        # Read accelerometer
        x, y, z = accel.acceleration
        accel_total = z # x=tilt, y=rotate
        accel_total_y = y # x=tilt, y=rotate
        print(accel_total_y)
        if accel_total > THRESHOLD:
            print("THRESHOLD: ", accel_total)
        if MODE == 1:
            animations.animate()
            if animations.current_animation.name == "BLACK":
                MODE = 2
        if MODE == 2:
            if y > CARVE_THRESHOLD:
                black_right.animate()
                carve_left.animate()
            if y < (CARVE_THRESHOLD * -1):
                black_left.animate()
                carve_right.animate()
            #print (MODE)
            cur_state = btn.value
            if cur_state != prev_state:
                if not cur_state:
                    MODE = 1
NUM_PIXELS = 211  # Number of pixels used in project
NEOPIXEL_PIN = board.D5
POWER_PIN = board.D10

Customizing Your Code

Unless your snowboard is exactly the same size as mine, you'll need to make a few tweaks to the code to get the animations to lay out correctly.

First, look near the top of the code for this section:

Change NUM_PIXELS to match the number of pixels you have on your board.

DELAY_MIN = 0.01  # In seconds, is the shortest DELAY between servo moves
DELAY_MAX = 0.1   # In seconds, is the longest DELAY between servo moves

Pixel Mapping

This project uses animations from the LED Animations Library to create various effects. You can learn a lot more about building and layering your own animations in that guide. It's easy to add new animations or customize the existing ones. 

One of the best features in this library is the Pixel Mapping function. This makes it easy to light up the pixels in any order you'd like, or to only light certain pixels instead of all of them. I've set up 5 different pixel maps: 

  • pixel_map_right (right side only)
  • pixel_map_left (left side only)
  • pixel_map_radiate (both sides, starting at the middle and lighting outwards)
  • pixel_map_sweep (both sides, starting at the front and sweeping back)
  • pixel_map_tail (only the pixels behind the back binding)

It takes a little work to get the pixels mapped out perfectly, but once you've got the maps set up you can apply any animation to any map, giving each animation 5 different ways to lay out. This is a really powerful feature!

To adjust the pixel maps for your board, find this section:


#PIXEL MAPS: Used for reordering pixels so the animations can run in different configurations.
#My LED strips inside the neck are accidentally swapped left-right,
#so these maps also correct for that


#Bottom up along both sides at once
pixel_map_right = PixelMap(pixels, [
    150, 151, 152, 149, 148, 147, 146, 145, 144, 143, 142,
    141, 140, 139, 138, 137, 136, 135, 134, 133, 132, 131, 
    130, 129, 128, 127, 126, 125, 124, 123, 122, 121, 120, 
    119, 118, 117, 116, 115, 114, 113, 112, 111, 110, 109, 
    108, 107, 106, 105, 104, 103, 102, 101, 100, 99, 98, 97, 
    96, 95, 94, 93, 92, 91, 90, 89, 88, 87, 86, 85, 84, 83, 
    82, 81, 80, 79, 78, 77, 76, 75, 74, 73, 72, 71, 70, 69, 
    68, 67, 66, 65, 64, 63, 62, 61, 60, 59, 58, 57, 56, 55, 
    54, 53, 52, 51, 50, 49, 48, 47, 46,
    ], individual_pixels=True)

#Starts at the bottom and goes around clockwise
pixel_map_left = PixelMap(pixels, [
    153, 154, 155, 156, 157, 158, 159, 160, 161, 162, 163, 164,
    165, 166, 167, 168, 169, 170, 171, 172, 173, 174, 175, 176, 
    177, 178, 179, 180, 181, 182, 183, 184, 185, 186, 187, 188, 189, 
    190, 191, 192, 193, 194, 195, 196, 197, 198, 199, 200, 201, 202,
    203, 204, 205, 206, 207, 208, 209, 210, 0, 1, 2, 3, 4, 5, 6, 7, 8, 9, 10,
    11, 12, 13, 14, 15, 16, 17, 18, 19, 20, 21, 22, 23, 24, 25, 26, 27, 28, 29,
    30, 31, 32, 33, 34, 35, 36, 37, 38, 39, 40, 41, 42, 43, 44, 45,
    ], individual_pixels=True)

#Radiates from the center outwards like a starburst
pixel_map_radiate = PixelMap(pixels, [
    206, 98, 205, 99, 207, 97, 204, 100, 208, 96, 203, 101, 209, 
    95, 202, 102, 210, 94, 0, 93, 92, 201, 103, 1, 91, 200, 104, 
    2, 90, 199, 105, 3, 89, 198, 106, 4, 88, 197, 107, 5, 87, 196, 
    108, 6, 86, 195, 109, 7, 85, 194, 110, 8, 84, 193, 111, 9, 83, 
    192, 112, 10, 82, 191, 113, 11, 81, 190, 114, 12, 80, 189, 115, 
    13, 79, 188, 116, 14, 78, 187, 117, 15, 77, 186, 118, 16, 76, 185, 
    119, 17, 75, 184, 120, 18, 74, 183, 121, 19, 73, 182, 122, 20, 72, 
    181, 123, 21, 71, 180, 124, 22, 70, 179, 125, 23, 69, 178, 126, 24, 
    68, 177, 127, 25, 67, 176, 128, 26, 66, 175, 129, 27, 65, 174, 130, 
    28, 64, 173, 131, 29, 63, 172, 132, 30, 62, 171, 133, 31, 61, 170, 134, 32,
    60, 169, 135, 33, 69, 168, 136, 34, 58, 167, 137, 35, 57, 166, 138, 36, 56, 
    165, 139, 37, 55, 164, 140, 38, 54, 163, 141, 39, 53, 162, 142, 40, 52, 161, 
    143, 41, 51, 160, 144, 42, 50, 159, 145, 43, 49, 158, 146, 44, 48, 157, 147, 
    45, 47, 156, 148, 46, 46, 155, 149, 47, 154, 149, 153, 150, 152, 151,
    ], individual_pixels=True)

#Top down along both sides at once
pixel_map_sweep = PixelMap(pixels, [
    151, 152, 150, 153, 149, 154, 148, 155, 147, 156, 146, 157, 145, 158, 
    144, 159, 143, 160, 142, 161, 141, 162, 140, 163, 139, 164, 138, 165, 
    137, 166, 136, 167, 135, 168, 134, 169, 133, 170, 132, 171, 131, 172, 
    130, 173, 129, 174, 128, 175, 127, 176, 126, 177, 125, 178, 124, 179, 
    123, 180, 122, 181, 121, 182, 120, 183, 119, 184, 118, 185, 117, 186, 
    116, 187, 115, 188, 114, 189, 113, 190, 112, 191, 111, 192, 110, 193, 
    109, 194, 108, 195, 107, 196, 106, 197, 105, 198, 104, 199, 103, 200, 
    102, 201, 101, 202, 100, 203, 99, 204, 98, 205, 97, 206, 96, 207, 95, 
    208, 94, 209, 93, 210, 92, 91, 0, 90, 1, 89, 2, 88, 3, 87, 4, 86, 5, 85, 
    6, 84, 7, 83, 8, 82, 9, 81, 10, 80, 11, 79, 12, 78, 13, 77, 14, 76, 15, 
    75, 16, 74, 17, 73, 18, 72, 19, 71, 20, 70, 21, 69, 22, 68, 23, 67, 24, 
    66, 25, 65, 24, 64, 25, 63, 26, 62, 27, 61, 28, 60, 29, 59, 30, 58, 31, 
    57, 32, 56, 33, 55, 34, 54, 35, 53, 36, 52, 37, 51, 38, 50, 39, 49, 40, 
    48, 41, 47, 42, 46, 43, 45, 44,
    ], individual_pixels=True)

pixel_map_tail = PixelMap(pixels, [
    15, 75, 16, 74, 17, 73, 18, 72, 19, 71, 20, 70, 21, 69, 22, 68, 23, 67, 
    24, 66, 25, 65, 24, 64, 25, 63, 26, 62, 27, 61, 28, 60, 29, 59, 30, 58, 
    31, 57, 32, 56, 33, 55, 34, 54, 35, 53, 36, 52, 37, 51, 38, 50, 39, 49, 
    40, 48, 41, 47, 42, 46, 43, 45, 44,
    ], individual_pixels=True)

pixel_map = [
    pixel_map_right,
    pixel_map_left,
    pixel_map_radiate,
    pixel_map_sweep,
    pixel_map_tail,
]

The pixels start with number 0 at the IN end of the strip and finish with 210 (in my case) at the end of the strip. So, for example, pixel 150 is right at the front of my board, so pixel_map_right starts with pixel number 150 and counts downwards (or "up" the strip) until I get to pixel 46, which is located right at the back of my board.

If you have fewer pixels than 211, the code won't compile correctly, so if you're getting errors this may be why. Play around with the numbers until the animations look the way you want on your board. 

The last line in the code chooses a random number of seconds to wait between flapping cycles. Change this to make the pauses shorter or longer.

Modes

This code includes 8 color modes, most of which are layered AnimationGroup modes. The LED Animations library has the ability to run more than one animation at a time, and I find it fun to layer chase-style animations over sparkle-style animations. The variety you can get from playing with different combinations is endless. 

The ninth mode is a faux "off" mode. This makes all the pixels go dark to save battery life. However, this mode isn't truly "off" since the Feather and Prop-Maker wing are still powered up. Click the on/off switch to turn the board fully off.

The tenth mode is a motion-reactive mode. It uses the Lis3dh accelerometer built into the Prop-Maker wing to light one edge or the other depending on the orientation of the board. 

Troubleshooting

If your CIRCUITPY drive does not appear, and you've already assembled your electronics, try clicking the on/off switch once. The switch needs to be in the ON position (even if you see an orange light on the board).

If you have blinking lights on your Feather and the pixels aren't lighting up, there may be a problem with your code. The MU editor has some great debugging tools. Here's some info about how to access them.

If you've changed NUM_PIXELS and not updated your pixel maps, the code will likely throw errors or not all the lights will come on. 

You can find more help in the CircuitPython main guide here.


If needed, solder the included headers to the underside of your Prop-Maker wing.

Stack the assembled Prop-Maker wing on top of the Feather board and solder them together. More about soldering headers can be found in our Headers Guide.

Solder a 3"-4" wire to each leg of your momentary switch and your on/off switch. Cover the connections with heat shrink.

Solder the momentary switch to the two holes on the Prop-Maker wing to A1 and G. These are the holes on either side of the hole marked with "(o)". It doesn't matter which wire goes to which hole.

Solder the two wires from the on/off switch to the G and EN pins on the Prop-Maker wing. Again, the wires are interchangeable here. The way these switches work is by briefly connecting the two wires together when the switch is pressed, and the code simply listens for the connection.

Since we've got tight quarters, we'll be placing the Feather right on top of the battery. To protect the battery and prevent shorts, glue a thin barrier on the battery. I used pink sparkly craft foam, because that's how I roll, but any non-conductive foam or tape or thick fabric should work here.

Plug your battery's JST connector into the connector on the side of the Feather. Make sure the lights on the board come on and turn off when you click the on/off switch.

Find the female side of your waterproof connector. Slide the included cover nut onto the cable with the open side toward the connector, as shown.

Slide the white nut from your cable gland onto the connector facing the other direction, with the open side toward the bare wires.

Open up your GoPro case. Use a 15/32 (12mm) drill bit to drill a hole in the side of the case next to the on/off button. Get it as centered as possible so the nut has room to screw down flush with the case. I found it helped to drill a smaller pilot hole first to keep my drill from wandering.

Screw your cable gland's main section firmly into the hole as shown, with the shorter side on the inside of the case. Thread the included plastic hex nut onto the outside and tighten it with a wrench.

Slip the  bare wire end of your waterproof connector into the cable gland from the outside, making sure not to dislodge the foam insert. Adjust it until just the bare wires are sticking out, with the main part of the cable inside the gland. 

Double check that you've got both connector nuts on your connector: the white one from the cable gland, ready to screw to the case, and the black one that came with the connector, ready to screw to the male end of the connector.

Once you're sure it looks right, screw the white connector nut onto the cable gland to lock the connector in place. Tighten with a wrench. 

Now that we've got a waterproof portal through our case, we can connect the 3-pin NeoPixel connector to the wires on the waterproof connector. Trim the yellow wire since we won't be using it. Connect white to white, red to red, and black to black. Cover the connections with heat shrink and solder.

Place the battery on the bottom of the case with the foam covering facing upward. Plug the NeoPixel connector into the Prop-Maker wing and nestle the Feather and Prop-Maker on top of the battery but leaving space around the two buttons on the case.

We'll use Thermoplastic to position our two switches inside the GoPro case to take advantage of the case's onboard buttons, so we can change modes and turn the board on and off without opening the case.

Use a heat gun or a pan of hot water to melt a small handful of plastic beads. They'll turn clear when they're ready to mold. Be careful - they can get pretty hot! Don't burn your fingers any more than necessary.

Position your momentary switch behind the button on the top side of the case. Mold some thermoplastic around it to hold it in exactly the right spot so the switch gets activated when you press the case button.

It's helpful to have your LED strip connected up so you can be sure the button is working. Let the thermoplastic cool to hardness once you've got it lined up.

I attempted to use the side button on the case in the same way with the on/off switch but the action on this switch is a little too firm and I couldn't get reliable on/off action. No worries - I can just open the case to turn the board on and off. I also added an "off" mode in the code, so I can save battery life while I'm on the lift without having to open the case. 

It would be a bit slicker with the on/off switch hooked up to the case, so next time I use this method I will experiment a bit more with switches to find just the right one.

Find the IN end of your NeoPixel strip - it is the end with the arrows pointing away, down the strip. If your strip already has wires connected, trim off any connectors, and trim off any additional power wires that might come pre-soldered. You want a black wire, a white wire, and a red wire remaining.

Lay out your strip around the perimeter of your snowboard on its edge with the lights facing outwards. Cut the strip to the desired length, cutting carefully between the copper pads.

Solder a red wire and a black wire to the +5v and G pads on the OUT end of the strip. 

Slide a piece of 3/4" clear heat shrink over each end of the pixel strip. Fill the heat shrink with hot glue, then while the glue is still wet, shrink the heat shrink with a heat gun. This will encase the wire connections in solid plastic, waterproofing your strip and keeping the connections safe.

Starting at the middle of the board between the bindings, lay a bead of silicone glue about 1/4" from the edge of the board. Don't get too close to the edge, or the snow will pull the LEDs right off.

Glue your pixels to the board as shown, starting between the bindings and lining the edge of the board with the pixels facing outward. This will give you the most visibility and illuminate the snow as you glide over it.

Clean off any excess glue with 99% alcohol before it dries. 

Strip some shielding off your wires. Twist the two red wires together and the two black wires together. We'll connect power and ground to both ends of the strip to help distribute power evenly along the pixels and to add a bit of robust-ness -- if any one of these four wires fails, the board will still light up.

Find the male half of your waterproof connector and slip the included silicone gasket into place.

Slip on another piece of 3/4" clear heat shrink, and also slide a piece of heat shrink onto the red, black, and white wires. 

Solder both of the red wires from the pixel strip to the red wire on the connector, and both black wires to the black connector wire. Solder the white wire from the IN end of the strip to the connector's white wire.

Plug your connector into your GoPro case setup and test to be sure everything works. Once it's all solid, waterproof this connection in the same way you did the pixels, filling the 3/4" clear heat shrink with hot glue to make a solid plastic encasement for your connection.

Add some more silicone glue to secure the wire bundle to the board behind the NeoPixel strip. 

Case Mounting

Initially I mounted the GoPro case directly to the board using the GoPro mount hardware that came with the case. After a few trial runs, I discovered that the electronics and battery seemed to get too cold being that close to the snow.

I used a second waterproof connector to make an extension cable for the GoPro case, so I can keep it in my pocket where it will stay quite a bit warmer. This made the board a bit more reliable for longer-term use.

This guide was first published on Apr 07, 2021. It was last updated on Apr 16, 2024.