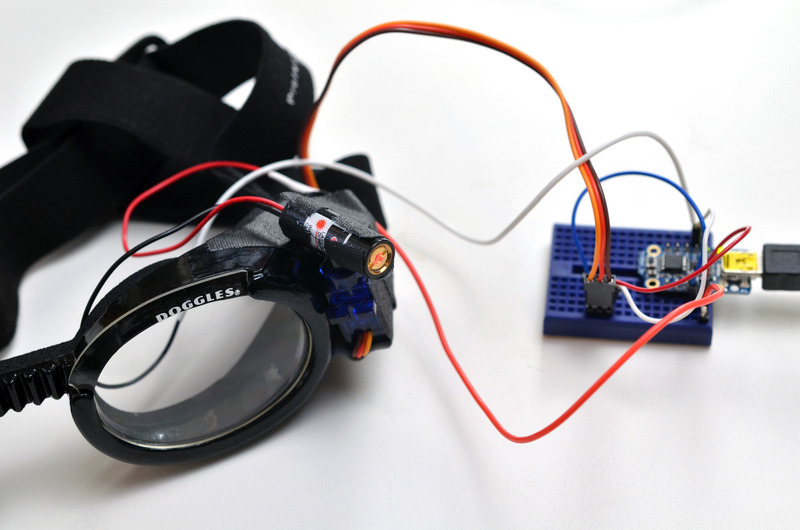
You will need the Adafruit_SoftServo library to run this sketch.
Plug your Trinket into your computer's USB port, press the reset button and upload the following sketch:
// SPDX-FileCopyrightText: 2018 Mikey Sklar for Adafruit Industries
//
// SPDX-License-Identifier: MIT

/*******************************************************************
  SoftServo sketch for Adafruit Trinket. Increments values to change position on the servo
  (0 = zero degrees, full = 180 degrees)

  Required library is the Adafruit_SoftServo library
  available at https://github.com/adafruit/Adafruit_SoftServo
  The standard Arduino IDE servo library will not work with 8 bit
  AVR microcontrollers like Trinket and Gemma due to differences
  in available timer hardware and programming. We simply refresh
  by piggy-backing on the timer0 millis() counter

  Required hardware includes an Adafruit Trinket microcontroller
  a servo motor, and a potentiometer (nominally 1Kohm to 100Kohm

  As written, this is specifically for the Trinket although it should
  be Gemma or other boards (Arduino Uno, etc.) with proper pin mappings

  Trinket:        USB+   Gnd   Pin #0
  Connection:     Servo+  -    Servo1

 *******************************************************************/

#include <Adafruit_SoftServo.h>  // SoftwareServo (works on non PWM pins)

#define SERVO1PIN 0   // Servo control line (orange) on Trinket Pin #0
int moveAmount = 1;  // change this value to change speed of servo
int servoPos = 0;  // variable for servo position

Adafruit_SoftServo myServo1;  //create servo object

void setup() {
  // Set up the interrupt that will refresh the servo for us automagically
  OCR0A = 0xAF;            // any number is OK
  TIMSK |= _BV(OCIE0A);    // Turn on the compare interrupt (below!)

  myServo1.attach(SERVO1PIN);   // Attach the servo to pin 0 on Trinket
  myServo1.write(90);           // Tell servo to go to position per quirk
  delay(15);                    // Wait 15ms for the servo to reach the position
}

void loop()  {

    myServo1.write(servoPos);                    // tell servo to go to position
  servoPos = servoPos + moveAmount;  // increment servo position (value between 0 and 180)
  if (servoPos == 0 || servoPos == 180){
    moveAmount = -moveAmount; //reverse incrementer at bounds
  }
  delay(15);                              // waits 15ms for the servo to reach the position
}

// We'll take advantage of the built in millis() timer that goes off
// to keep track of time, and refresh the servo every 20 milliseconds
// The SIGNAL(TIMER0_COMPA_vect) function is the interrupt that will be
// Called by the microcontroller every 2 milliseconds
volatile uint8_t counter = 0;
SIGNAL(TIMER0_COMPA_vect) {
  // this gets called every 2 milliseconds
  counter += 2;
  // every 20 milliseconds, refresh the servos!
  if (counter >= 20) {
    counter = 0;
    myServo1.refresh();
  }
}
When the variable moveAmount is increased, the motor moves faster and makes more noise. A squeaking motor next to your dog's ear is not nice, so keep it slow and quiet!
Adjust the position of the flat paddle servo attachment on the servo's toothed shaft until you're happy with the alignment.
Without removing the flat paddle from the servo, untape the laser and use one of the included screws to secure the paddle to the servo. Retape the laser to the paddle.


