To test out the BLE UART service that is used to transfer data between the BLEFriend and your Bluetooth Low Energy enabled mobile device, you can used the nRF UART application from Nordic Semiconductors for iOS or Android.
BLEFriend Configuration
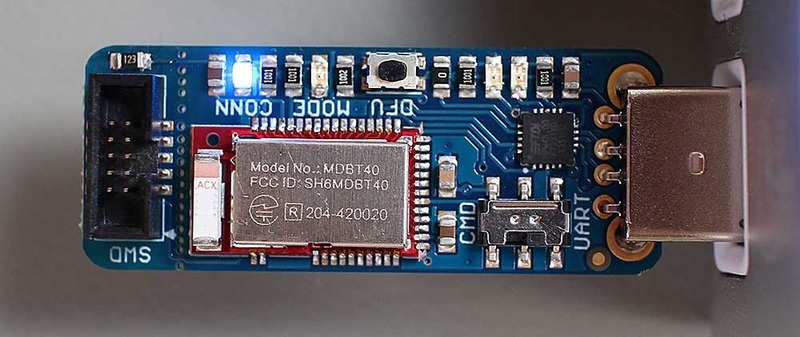
Set the BLEFriend to DATA MODE by placing the mode selector switch (near the USB connector) to the UART position.
The 'MODE' indicator LED will blink two times and then pause for three seconds when you are in DATA mode:
Using your favorite terminal emulator, connect to the BLEFriend at 9600 baud with HW flow control enabled.
nRF UART Configuration
Open the nRF UART application on Android or iOS, and click the 'Connect' button

After clicking on 'Connect' you should see a list of BLE peripherals in range:

Select the 'UART' device by clicking on it from the popup selection dialogue, and a connection will be established between the BLEFriend and your phone or tablet.
NOTE: You know that you are connected to another device when the CONN LED is lit up on the BLEFriend:
Once you see the 'Connected To: UART' message in nRF UART, you can start sending and receiving data between the two devices using the mobile app or the terminal emulator.
Sending data from one device should cause the text to appear on the other end:

On the BLEFriend side we can see the 'testing' string that was sent from nRF UART in the terminal emulator below:

Typing data into the terminal emulator will cause it to appear in the nRF UART application, as shown below:

The incoming data is broken up into small packets because it is transferred in chunks of up to 20 bytes per payload.
All data transfers in BLE occur at a rate controlled by the BLE central device (the phone or tablet). Every n milliseconds, the phone will ping the BLE peripheral (the BLEFriend) and check if there is any data available.
If anything is found in the UART FIFO, for example, it will be sent and data will start to accumulate again in the FIFO until the next connection event.
Sample Video
Download the screen capture below to see nRF UART in action, first receiving 'this is a test' from the BLEFriend (typed in on the terminal emulator), and then sending 'adafruit' out to the BLEFriend, where is will appear in the terminal emulator.
Depending on which terminal emulator SW you use, you would see something like this on your development machine running a similar demo yourself:


