


- Bridge the charge pad on the back with a blob of solder, to make your battery charge faster
- Cut the trace between the switch pads on the front to enable your on/off switch.


Trim the switch legs to about half their length. Solder a 4" wire to the middle leg and to one of the side legs, and cut off the other side leg. Secure the connections with heat shrink.


Trim your photo cell's legs to about 1/3 of their length. Solder a stranded black wire to one leg, and two stranded colored wires to the other leg. (The legs are interchangeable so it doesn't matter which is which.) Cover each connection with heat shrink, then cover the whole photo cell with larger heat shrink, leaving the top visible and uncovered.
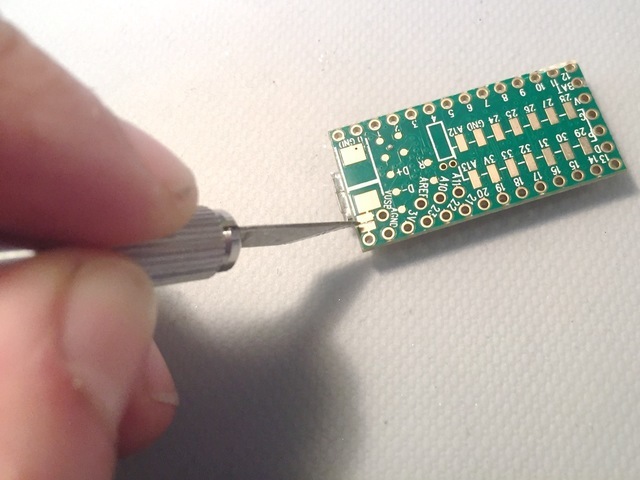


Cut the trace between the USB charging pads on the back of the Teensy.
Place a large piece of thick tape (gaffer's tape or duct tape works great) over the back of the OLED display, carefully covering all the exposed components but leaving the solder hole labels visible.

Using silicone stranded wire, solder two red wires into VIN and two black wires into G on your Teensy.
We're using silicone stranded wire here because the solid core wires won't fit two-to-a-hole.


Set the charger next to the Teensy and solder a solid core wire from Teensy's USB pin to the charger's 5V pin.
Solder one of the stranded red wires to BAT and one of the stranded black wires to G.

Solder various colors of solid core wires to Teensy's pin 7, 8, 9, 11, and 13. We'll trim these to length later, for now just be sure they're at least a couple inches long.

Trim one leg of your resistor down and solder it into the 3.3V pin on the Teensy. Solder the other leg to one of the wires coming from your Photo cell sensor. Cover the whole resistor with heat shrink.
Solder the other colored wire from the Photo cell into Teensy's pin 16, and the black wire into the GND pin next to the Teensy's reset button.

Place the Teensy and charger in line with the back of the OLED display as shown. Carefully trim and solder all the remaining wires to the OLED display.

Plug your battery in and slide it between the OLED display and the rest of the components. Wind the wire around and bend the solid core wires until you have a tidy package. Secure everything in place with a few judicious blobs of hot glue.


