One of the biggest challenges for software projects of all kinds is ensuring the software works as expected. This isn't as simple as it seems, particularly when multiple people are working on a project at once. Each person has different expectations about what the code should do and different testing setups.
Testing is used to make sure that each person's expectations are compatible and that the software still meets those expectations. Often testing is overlooked out of an urge for expediency. However, its well understood that, in the long term, good testing can help increase the development pace of a library. This is due to the confidence gained from tests that validate all expected functionality. It allows a maintainer to know immediately whether a requested change breaks any existing expectations or not. If it doesn't break anything, then its much easier to accept into the existing code.
Unfortunately, testing can be complicated and is worth covering in another full guide. This is especially true with CircuitPython where code is running on a microcontroller rather than a full operating system. For now, we'll just cover the basics of setting up Travis.
Travis CI
A cornerstone of good testing practice (and the Not Rocket Science Rule) is continuous integration (CI for short). CI is the process of automatically running tests on every change to a source code repository. In our case, we'll hook up Travis CI to our GitHub repo so that it tests each commit including proposed pull requests. Furthermore, it will automatically create an mpy file for each of our releases.
To get started with Travis, visit the website and sign up. Once signed in, you'll see a list of currently active repositories.
Once there, click the plus to activate your new repository.

Now scroll down the page until you see the new repo and click the switch on the left to activate it.


Now that its activated, click the repo name to see its status.

Now from that page click Build History. Nothing should appear yet, so do a small commit (Add more to your README for example) to test that its set up correctly. Refresh the build history tab and you should see a yellow pending build. Once it completes, it should be green.


Releasing mpys
mpy files are convenient, binary Python files that are easier to load when memory is tight. Travis can automatically build them and attach them to a release. The .travis.yml file already has everything configured except for permissions to attach files to releases. :-) (Shout out to TonyD for adding this support.)
To give Travis rights to attach files to our releases we'll need to generate a personal access token for GitHub. Never ever share these tokens with anyone! They allow anyone to act as you on GitHub in limited scopes.
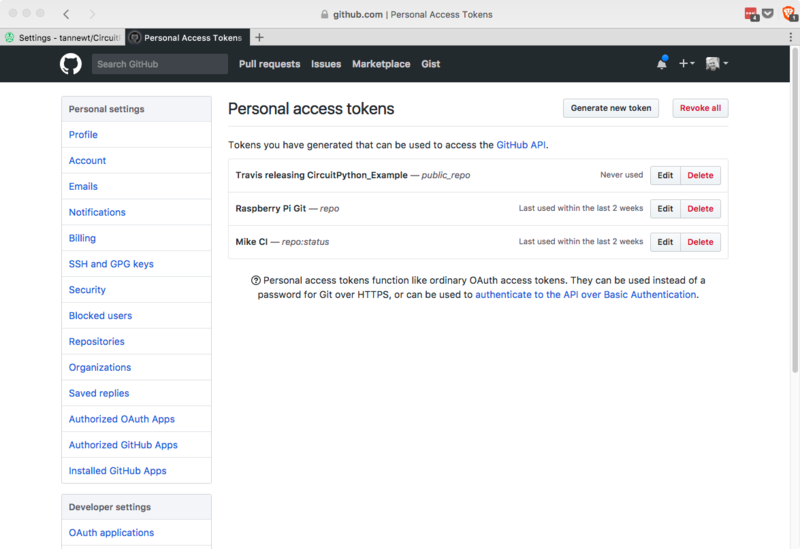
To generate a new one, head to your GitHub settings and select Personal Access Tokens.


Once there you will see everything that you've already generated an access token for. The tokens themselves aren't ever visible after they are generated. Instead, you can always generate a new token. Delete any tokens you aren't using currently or those that may have accidently been shared.
For now, we'll generate a new token.

Now fill out the description so that you know what the key was used for and can tell in the future if you still need it.
Also tick the box next to public_repo this gives anyone with the token access to all of your public repos so be very careful with the token. We trust Travis CI so its ok to give it to them.
Lastly, scroll down and click Generate Token.


This will take you back to the token list with a new entry in green with the token visible. Click the copy button to copy it to keyboard and switch back to the Travis tab. If you lose the token, you can regenerate a new one by clicking edit.

Now that we have a code, lets set it up in Travis. Navigate to the build's settings by clicking Settings under More Options. Scroll down to the Environment Variables section and enter it with the name GITHUB_TOKEN and the copied token as the value. Leave Display value in build log OFF otherwise you'll share the token with the world. Lastly, click Add.


After clicking Add we should see a new entry for GITHUB_TOKEN with our token obscured. Don't worry, it saved ok. They are just doing their best to keep it secret too. Time to release!

Also, don't forget to close or refresh the GitHub tab with your token. You don't want to accidently share it in later screenshots. Refreshing will show our description rather than the token.