


Start by cutting a rectangle of cardboard: 10cm (4") by ~18cm (7") works well. It's best if it's cut so that the corrugations run along the length of the piece. Mark a center line lengthwise, which will be used later to center the Circuit Playground Express and battery. Also mark a line across the piece, about 1 cm from one end.
Measure the body of your servos and mark two rectangles slightly smaller, near the edge (5mm - 3/8" in the image here). For the servos listed, 12mm (4 3/4") by 22 (8 7/8") mm works well or trace them out. The goal is to have the servos fit very snuggly into the holes. Carefully cut them out.
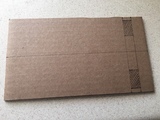
When you're marking something like this with areas to be cut out, it can be useful to mark the areas to be removed as was done here.


Carefully (very carefully) push the servos into position. The output shafts need to be closest to the edge.
Make sure they fit all the way in with their mounting flanges flush against the cardboard.
Back the servos out a little and squirt some hot glue on the cardboard under their mounting flanges. Then slide them back into position. Because of the snug fit you just need a little glue to hold them in place.


Take 3 Male/Male jumpers in colors that match your servo wires. This just makes it easier to connect them later. Cut a 4-5 centimeters (2") from each end.
Strip and tin the ends. Then carefully solder them to the appropriate pads on the Circuit Playground Express.
In this case brown is ground, red is power (Vout), and orange is the PWM signal. This matches the micro servos used.


Place the Circuit Playground Express and battery on the base as shown. The battery should be as near the "back" end as possible. Leave some room between it and the Circuit Playground Express for wiring. Mark and cut a small slot between the two, big enough for the battery and servo connectors to be fed through.
When positioning, the battery cable must be able to reach under the base, through the hole, and into the Circuit Playground Express's battery connector.
While a smaller battery would work and weigh less, the larger one was found (through trial and error) to better balance the glider. Even with the additional weight, this improved overall performance by preventing an immediate nose-dive due to the servos at the leading end.
Add a piece of double sided tape the the Circuit Playground Express and battery. You really just need enough to hold them in place.


Loop the servo wires around the servo bodies and secure with a zip tie (or wire twist-tie, or bit of string... it's not important what) to keep them tidy and out of the way.
This should leave enough length to go through the hole you cut between the Circuit Playground Express and battery. Similarly, the battery wire should go along the underside and through the hole.
Secure the Circuit Playground Express and battery in place, and connect the wiring.
Connect the servo at the bottom of the last photo to A1, and the one at the top to A2.


Use the code on the left in MakeCode to set the servos to rest position. Mount the longest servo horns as shown. The servo write pin block is under the PINS block group which you can chose from if you click the black ADVANCED block first.


Select 4 skewers that are reasonably straight and cut them to the same length. These will probably be around 30cm long, so just cut the point off as we want them as long as we can get (within length) since their length determines the area of the wings, and thus their effectiveness.
Run the end of a skewer along the long edges of the base to make a channel that a skewer can nestle into.
Hot glue a skewer into each of those edge channels so that they are flush with the end near the servos and extend past the end with the battery.
Hot glue the other two skewers to the servo horns so that they extend alongside the skewers that you glued to the base. Using hot glue with the slick plastic the horns are made of did not inspire confidence, so adding a couple zip ties to each servo horn seems to be a good idea.


Add these blocks to your MakeCode program so the arms can be tested using the two Circuit Playground Express buttons.
When extended the bot should look like the photo to the left.
Be careful not to interfere with the servos. Doing so can risk stripping their gears.


Place the bot with it's wings extended on a sheet of plastic. This could be a shopping bag or garbage bag that's been cut to provide a single sheet.
Use hot glue along the skewers on the sides of the bot and attach the plastic sheet. When that's dry use hot glue at the ends of the wings to attach the sheet. Do not stretch it tight, it has to be loose enough to allow the arms to extend as well as retract fully. Failure to allow that will result in stripped servos. Again... this was proved by trial and error. Metal gear servos might be a better choice. Although they would add more weight.
Be careful as the tip of the hot glue gun will instantly melt the thin plastic sheeting.
Finally, trim the wings to a roughly triangular shape.


