To use the LCD+Backpack on Windows systems, you’ll first need to download this .INF driver file. This makes the device appear as a COM port.
Then you’ll want to download LCD Smartie, which provides all the system status and monitoring information.
With a clean system and the .INF file, you might be able to skip ahead to the “browse” step below (step 6). But it’s pretty common to excitedly plug in the new device without the driver file ready, ending up with a botched and non-working device. If this happens, download the .INF and proceed through these steps…


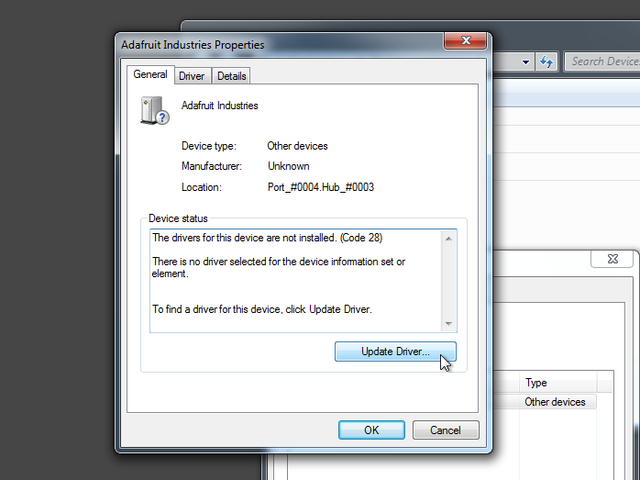
This panel lists devices (printers, etc.) connected to the system. At the bottom will be an unspecified device labeled “Adafruit Industries.”
Right-click this item and select “Properties.” (Or just double-click the icon.)
Right-click this item and select “Properties.” (Or just double-click the icon.)

From the “Hardware” tab of the Properties panel, click the “Properties” button. It’s properties all the way down!

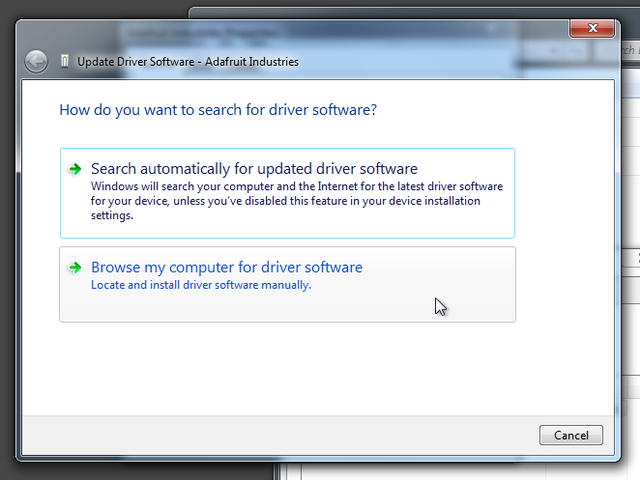
When prompted, select “Browse my computer for driver software” (do not use the automatic search).
You’ll be presented with a file selection dialog. Navigate to the location of the previously-downloaded .INF file. It’s probably in the Downloads folder.
You’ll be presented with a file selection dialog. Navigate to the location of the previously-downloaded .INF file. It’s probably in the Downloads folder.

You’ll see a message about an unsigned driver. That’s okay, tell it to go ahead an install.
In a moment, the LCD+Backpack should show in the Devices panel as a “Communications Port,” along with a COM port number. Keep track of that port number, you’ll need it in a moment.
In a moment, the LCD+Backpack should show in the Devices panel as a “Communications Port,” along with a COM port number. Keep track of that port number, you’ll need it in a moment.
If you haven’t extracted and installed the LCD Smartie software, go ahead and do that now.
LCD Smartie is a “classic” piece of software…the last official release was in 2007…but the good news is that it works well with current versions of Windows, though the user interface is a bit dated. This is a complex package with a ton of features, more than we can cover here. Some instructions are available on the LCD Smartie web site, or you can explore the GUI and work out most of these options.
First we need to set it up for our LCD+Backpack.
Click “Setup” in the small LCD Smartie window, which brings up the massive configuration dialog. From the “Screens” tab, in the “Display settings” section at the top right, select the “Plugin” tab. Select matrix.dll from the Display Plugin menu, and change the Startup Parameters to reflect the correct COM port for the device. You will need to quit and restart LCD Smartie after changing the COM port setting.

In the “Startup/Shutdown” tab, you’ll see there are options to run the software automatically at system startup, so you don’t need to go through this process every time.


