

Overview


So how do we get our project off the workbench and out into the world?
Page last edited July 24, 2012
Text editor powered by tinymce.
About Batteries

These cells are more expensive up front, and require a charger. But for frequent use, they can be more economical in the long run.

Though not reusable, for occasional use they may be more economical. But the main benefit is their ubiquity — replacements can be bought almost anywhere, important when you’re away from home and a charger.

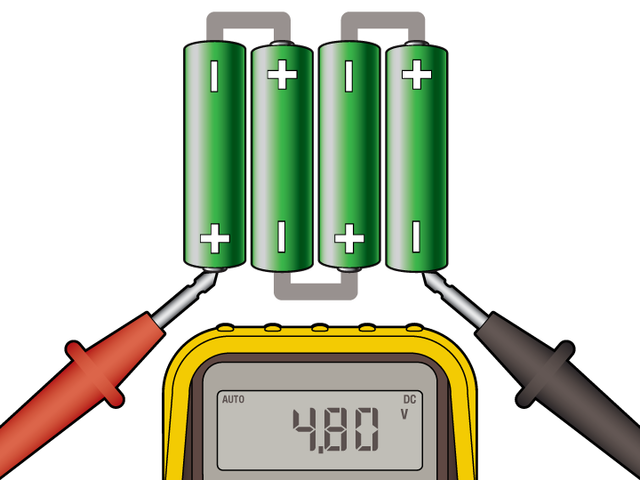

Page last edited July 24, 2012
Text editor powered by tinymce.
Diode Fix for Alkaline Batteries
“I don’t know if you wanna trust the safety of our country to some, uh…silicone diode!”
— General Beringer, WarGames

This same solution can be seen in our Digital Programmable LED Belt Kit.
Diodes have a specific polarity, passing current in only one direction…the silver stripe is the + end. So we want to connect the + terminal from the battery pack to the “dark” end with no stripe.

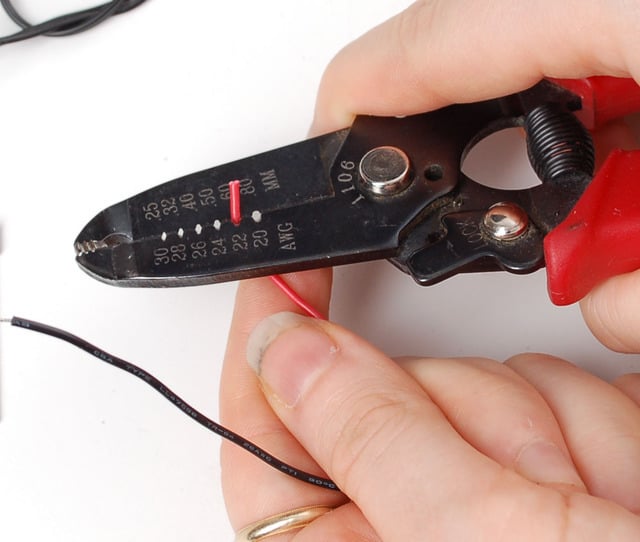


Cut off and slide a 2" piece of heat shrink tube onto the red wire. Keep sliding it all the way past the diode.

Now solder the positive wire from your LED circuit to the “stripe” end of the diode. Or you can add a plug/receptacle pair between the two to make them easier to separate and service later on.


Shrink the tubing to grip the diode and wires. You can use a heat gun, lighter or the edge of your soldering iron.
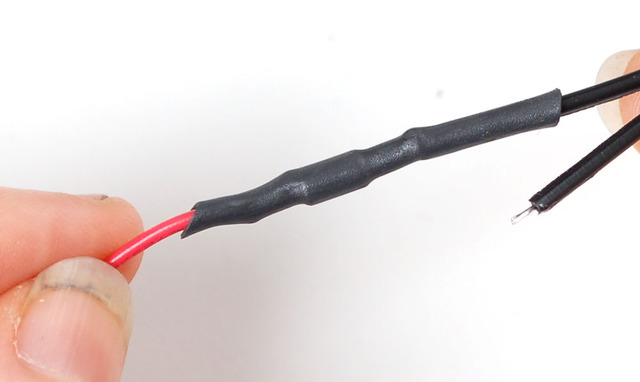
The black wire from the battery holder then connects to the ground wire of the LED circuit (or plug/receptacle, if you’ve installed one). This side is much simpler than the diode-equipped wire:

Slide a small 1" piece of heat shrink onto the black wire (this image shows a much shorter piece…oops…go a little longer than this).


Page last edited July 24, 2012
Text editor powered by tinymce.
Powering the Microcontroller

Page last edited July 24, 2012
Text editor powered by tinymce.
Estimating Running Time
Also, battery manufacturers often overstate their cells’ capacity, or express it under extremely idealized circumstances.

Elsewhere in the datasheet (or often printed on the cell itself, in the case of rechargeables), you may find a capacity in mAh (milliamp-hours).


Complicating matters further, the LED driver chips themselves use a tiny bit of current, even when the LEDs themselves are “off.” Each chip needs about 2 mA extra…for a strand of 25, it’s using about 50 mA just in this idle state. You may want to factor this into your estimation. Oh, and we forgot to mention power use for the microcontroller that’s driving all this…about 25 mA or so for an Arduino. So we’ll add about 75 mA to the above estimate: 2100 mAh ÷ 525 mA = 4 hours.
If you have a really nice multimeter with an average current recording mode, it will be your new best friend, because it’s doing this based on actual readings. But this capability is usually present only in high-end meters.
You may also want to add some “engineering overhead” to your estimate. Remember what was said about battery capacity often being idealized. So we’ll de-rate the battery by a bit, let’s assume reality is about 80% of the stated capacity: 2100 mAh × 0.8 = 1680 mAh. 1680 mAh ÷ 525 mA = 3.2 hours.
As you can see, there’s an awful lot of fudging and speculation in this process. This is why we say it’s easiest sometimes just to plug in some batteries and keep an eye on it!
Page last edited July 24, 2012
Text editor powered by tinymce.
Tips for Larger Projects

- A fully-lit 1 meter strip can demand close to 2 Amps, but the batteries and diode are only rated for a continuous output of about 1 Amp. You can push beyond this for brief intervals, but it can’t be sustained. Design your software so that the LEDs seldom or never exceed this level, using the 60 mA rule of thumb.
- Voltage diminishes slightly along the length of a strand. And when voltage drops too far, the LEDs will show dim and muddy colors. When using long runs of LEDs, we recommend adding an extra power tap every meter or 25 pixels to reduce this voltage drop.
- Remember that “off” pixels still need a tiny bit of current for the driver chips…about 50 mA per strand or meter…and another 25 mA for the microcontroller. Factor this into your battery calculations and software design. Large setups may be using hundreds of milliamps that are never seen, but continuously pass through that diode with its 1 Amp ceiling.
- C or D cells have more capacity for extra run time (up to 12,000 mAh with top-of-the-line NiMH D cells). We don't stock battery holders for these, but suitable ones can be found at Radio Shack and elsewhere. The 1N4001 diode is still rated for 1 Amp continuous output though…so for a larger project with many LEDs simultaneously lit, you might need to swap this out for a beefier diode such as a 1N5400, good for up to 3 Amps. This may get hot, so don’t leave it exposed to curious fingers.
Page last edited July 24, 2012
Text editor powered by tinymce.


