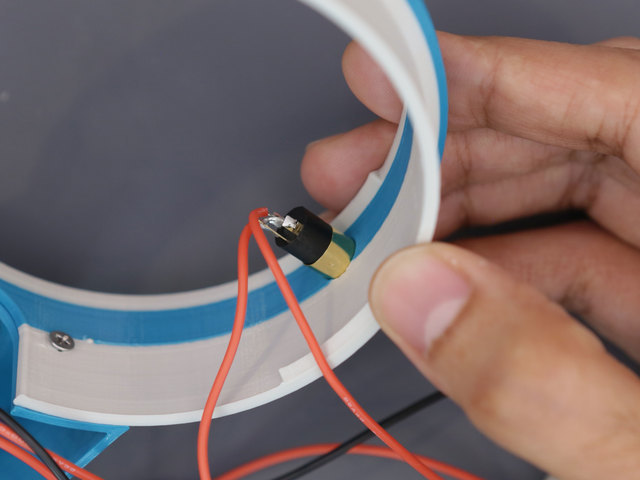
Install TRS Jack
Panel mount the jack to the frame. You'll want to remove the hex nut from the jack first. Then, insert the tip of the jack through the hole on the inside of the frame. If it's too tight to fit all the way through, use a filing tool to sand. Use the hex nut to secure the jack to the frame.

Secure TRS Jack to Frame
Use a pair of pliers to grasp onto the hex nut and fasten tightly. The nut should have a good hold on the frame and jack. Avoid twisting up the wires on the other end of the jack.

Install VERTER to Base
Place the VERTER PCB over the standoffs on the base. Line up the mounting holes near the battery connections with the holes in the standoffs. Insert two M2.5 x 5mm flat Phillips screws into the mounting holes and fasten until fully tight.

Installing Switch
Insert the body of the slide switch into the switch holder at an angle and firmly press down. The actuator should protrude through the opening. The switch should have a snug fit and holds in place.

Installing DC Motor
Press the body of the motor into the motor mount on the base. The leads should be oriented with the cut away so they don't intersect with the mount.

Installed DC Motor
The leads should be facing the opening so the wires should be fine. The motor should have a decent hold once in the mount but it should be easy to remove it as well.

Install Bottom Cover to Frame
Now we can joint the base (bottom cover) to the frame. Line up the nubs on the frame with the indentations on the lip of the base. Firmly press them together until they click into place.

Install Battery to Clip
We can connect the 9V battery to the battery clip, if we haven't already. Be sure to fully seat the electrodes of the battery to the clip, they should click when fully connected.

Mounting Battery
I added a piece of mounting tack to the battery so I can stick it to the base. This prevents the battery from moving around inside the enclosure. You can optionally use double-stick tape or similar.

Secured Battery
There's just enough room on one side of the base for the 9V battery to fit. Just be sure to position the wires so they are not being kinked from the battery.

Install Bearing
Now we can install the radial ball bearing to the base. The inner ring of the bearing should press fit into the nub on the top of the platform. It should have a snug fit so you may need to firmly press down on it to fully seat it.

Install Wheel to DC Motor
The wheel should be press fitted onto the shaft of the DC motor. There's a small hole in the center that should allow the shaft to be inserted through. The top surface of the wheel should be lined up with the top of the shaft.

Installed Wheel
The diameter of the wheel may shrink during the cooling process after 3d printing, so I purposely designed the wheel slightly larger. Here I'm using a sticker label to note the diameter of the wheel in CAD, not in physical space.

Cover and Cap
The cap snaps on top of the cover. The inner nubs on the cover will click into the indentations on the edge of the cap.

Installing Cap to Cover
You'll need to firmly press the two parts together to get them to snap fit together. Just be sure the features are lined up. I found fitting them at an angle first works better than trying to connect both nubs are the same time.

Installing Cap to Frame
Now we can fit the cover/cap onto the top of the frame. Line up the indentations on the side of the lip on the cover with the nubs on the frame. Firmly press them together to click them together. Lots of snap fitting parts here!

Installed Cap
The cover/cap should be flush with the frame. The front facing side of the frame features a cutaway – This allows you to pop off the cover when you need to change the battery. You can use your finger nail or a prying tool to remove the cover.

Bottom Cover for Button Box
Now we can fit the button box cover over the button box. It's got a short nub on the box so you can easily press fit the bottom cover.

Installed Bottom Cover
Here's the bottom cover installed, it's flush with the button box with a very slight gap between the two parts. The tolerances should be pretty snug so theres very little wiggle room.

Using Velvet on Platter
When the platter spins, the surface needs to be able to toss dice around. The surface of the platter as is straight off the printer will be fairly smooth so it won't be able to do much to the dice. I cutout a piece of velvet/velour paper and stuck it to the top surface of the platter. This works well and gives the surface a texture. I used scissors to cut out a circular piece using the platter as a template. Secured with double-sided scotch tape.

Installing Platter
Now we can fit the platter over the outer ring of the radial ball bearing. It should have a fairly snug fit but should be easy to remove and pop off as well. Firmly press down on the platter to fully seat it onto the bearing.

Installed Platter
Spin the platter with your finger to test it. The platter should rotate evenly, without too much wobble. If there's a bit of wobble, inspect the inside cavity – You may need to clean out any spring or plastic bits that may have formed during the 3D printing process. Use sand paper or filing tools as necessary.

Rotating Platter
Now it's time to test it out! Power on the circuit with the slide switch and press the arcade button to get the platter going. It should spin fairly fast. If you find the platter will not spin, the wheel must be stuck. Give it a turn and feel how "loose" the platter can rotate. If its hard, you may need to print the wheel slightly smaller to minimize the friction between the platter and the wheel.

Installing Snow Globe to Cap
If everything is working properly, you can secure the snow globe onto the cap by twisting it on. The thread on the cap should mate nicely with the snow globe.

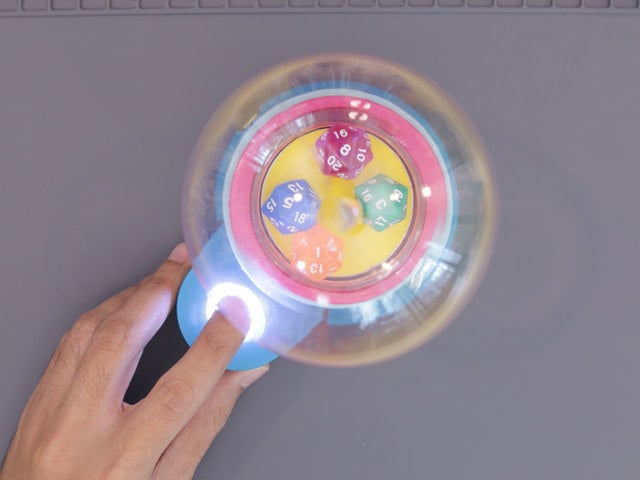
Testing with Dice
The DC motor will struggle to rotate the platter with too much weight. I've tested with 4-5 dice (d20 type) which is ~22 grams in weight. I tried fitting 7 D20 dice (38g) and it struggled to rotate. When there's too much weight the motor simply cannot handle the load. But for most use cases, it should be fine!


