


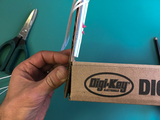
- Align a piece of cardboard so that the "grain" of the corrugated flutes is oriented vertically
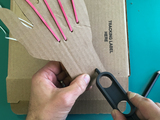
- Use a pencil to trace your hand
- With a hobby knife, cut out the pattern of your hand


- With a pencil, mark the locations of each finger joint
- Gently score each mark with your knife to aid in bending
- Carefully bend each joint to give the fingers a natural curl and to guide them later when they're pulled with a cord by the servos


- Cut small segments of drinking straws to length so that they will fit on each finger segments without colliding with their neighboring segments when bent
- Using the hot melt glue gun, secure each segment in place


- Cut four lengths of cord, string, or yarn to about 18" each
- Thread each cord through the straw of its respective finger
- Fold the tip over and glue it in place from the back
- Once the glue has cooled sufficiently, test the pull of each string -- they should easily curl each finger


- Cut each rubber band into a single strip
- Glue one end of each band to a finger tip on the back side of the finger
- Using a pencil, poke a hole through the back of the hand at the base of each finger
- Push the rubber band end through the hole, then pull it taut enough to give the finger a good return action, but not so tight that it can't be bent by pulling the cord
- Tie off each band in the palm area


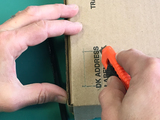
- Position the hand at one edge of the box
- Mark two spots to poke holes in the hand and the box side
- Poke the holes through with the Make Do tool
- Screw in two screws to hold the hand in place


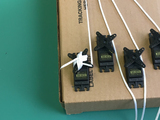
- Lay out the servos so there will be enough clearance that the servo horns don't collide
- Mark positions for each servo -- keep the marks a bit smaller than the dimensions of the servo so the fit will be tight and hold them in place
- Cut the holes out with the hobby knife
- Feed the wires into the box, then press the servos in place


- Orient the shafts fully counter-clockwise
- Lift of the servo horns and then reposition them on the shafts so the arm you'll connect to the cord is at the one o'clock position
- Thread a cord through the end hole on that arm for each servo
- Pull the cord taut, but not to much -- there should be a slight bend to each finger
- Wrap off the cords around the servo horns like you would a cleat hitch -- a figure eight pattern where the final loop wraps the tail underneath the cord so it doesn't come loose


- Position the CRICKIT on the box so there will be enough clearance to use the capacitive touch pads
- Mark a position on the box near the servo connectors to run the wiring
- Cut out the hole, then pull the wires up through
- Plug in the servos -- the yellow signal wires should be at the outer edge of the board


