For more controlling than 8 servos, you can stack Servo FeatherWings, but the assembly is a little different. You'll need to grab these products from the shop:

Add the FeatherWing:
Place the stacking headers into the FeatherWing so that the long pins poke through the two rows of breakout pads. Make sure the long pins are sticking out underneath the FeatherWing.

To make it easier to keep these in place, you can use some tape to hold down the two header pieces. Tacky clay also works, whatever you've got handy!


And Solder!
Be sure to solder all pins for reliable electrical contact.
(For tips on soldering, be sure to check out ourGuide to Excellent Soldering).
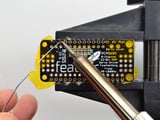
Start by soldering the first row of header


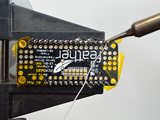
Now flip around and solder the other row completely
When you are finished, check that your soldered joints are nice and shiny, then continue to the next step


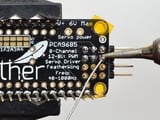
Next we will solder in the right angle header blocks used to plug in servos into the FeatherWing. There are two blocks, each are 3x4 headers in size.
They go on either end. Make sure the long side of the headers is sticking off the top left & top right sides!
Again, use some tape to hold down the two header pieces in place to make soldering easier.


Now that you're done with the header blocks, check your work make sure that each solder joint is done and looks shiny.


Last is the 3.5mm terminal block used for power. This is how you will provide the large amount of current that servos require.
Make sure the two open parts of the terminal face outwards so you can easily connect wires. You'll want to tack down this one too.


OK You're done! Check out the Advanced Usage page for information on selecting an address for each board!
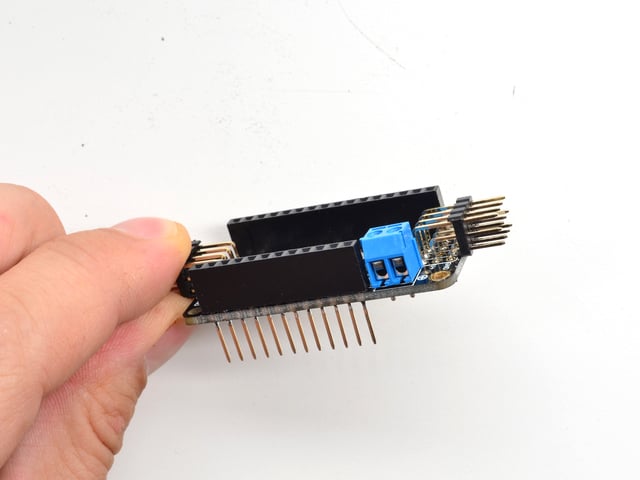
You can now stack your FeatherWings and get servo'ing