Once you're confident that the hardware is working and programmed, it's time to attach it to the disc. You'll need:
- A tube of E6000 adhesive
- 1-2 non-conductive washers or spacers, rubber or nylon, to raise the Gemma above the level of the NeoPixel ring so that the battery and USB cable can still be connected
- Gemma + NeoPixel + vibration switch assembly
- Random small, flat object (a washer may work well) for counterweighting battery
- Sturdy self-adhesive velcro patches (or, in a pinch, tape) for battery and counterweight
Start by levelling the area the ring will occupy in the center of the disc (cutting off any bits of plastic that project too far from the surface), and trimming the ends of the light pipes and the channels they snap into (if using a Flashflight) to line up with the LEDs on the NeoPixel ring.
I found it easiest to eyeball the alignment of the ring and score the pipes/channels with a knife, then use a pair of scissors to snip the pipes. Be a little careful with this part - the light pipes are more brittle than the plastic that makes up the rest of the disc, but they should bend far enough to be easily cut and go back into place without much trouble.
This step isn't strictly necessary, but the final disc will look a lot cooler if the LEDs are in proximity to the ends of the light pipes.


First, apply E6000 to the washers and Gemma, centering it in the disc. Once that's in place, lay down a thick bead in the footprint of the NeoPixel ring, and press it firmly into place. This photo, minus the vibration switch, shows the positioning you're looking for:
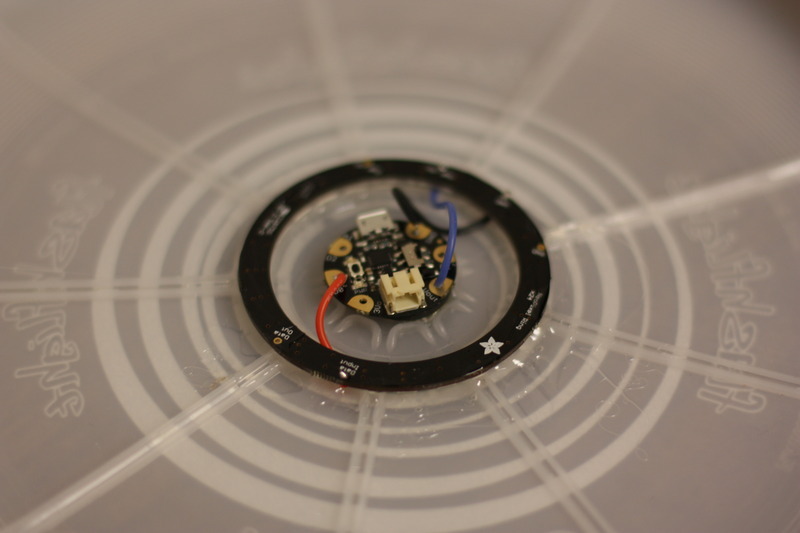
Think of the E6000 as a structural element - it should hold the ring firmly into place, and partly function to diffuse the light from the LEDs.
Once this is done, set the disc aside on a flat surface and do not touch it for 24 hours. Seriously, come back in a day.
Now you need power. To attach the battery, I used self-adhesive velcro squares - one side on the battery, one side on the disc, positioned like so:

I was worried about the battery wires snagging on something, so I added an extra square with some plastic over the adhesive on the top piece to hold them in place.

As soon as I tested this in flight, I realized the off-center weight was introducing a predictable wobble, so I added some more velcro with a small piece of wood on the opposite side to counterbalance the battery. (You may need to experiment with placement.)

Once I'd flight-tested the disc and was sure I was happy with the hardware layout, I added a healthy dose of hot glue to hold wires and the vibration sensor in place.


