What Is OctoPrint?

OctoPrint is a piece of software for the Raspberry Pi (or other platforms) that allows you to wirelessly control and monitor a 3D printer. It's host software that turns the Raspberry Pi into a server, adding a web interface. For a full list of features and functionalty, please check out the OctoPrint website.

Why Would I want OctoPrint?

Ideally, if you're tired of walking up to your printer and inserting/removing an SD card. If your 3D printer is not near your workspace (or tetherd to your desktop/laptop) and you want to quickly preheat / home axises without having to fiddle with the on-board screen (if the 3D printer even has one). 

OctoPrint & Raspberry Pi

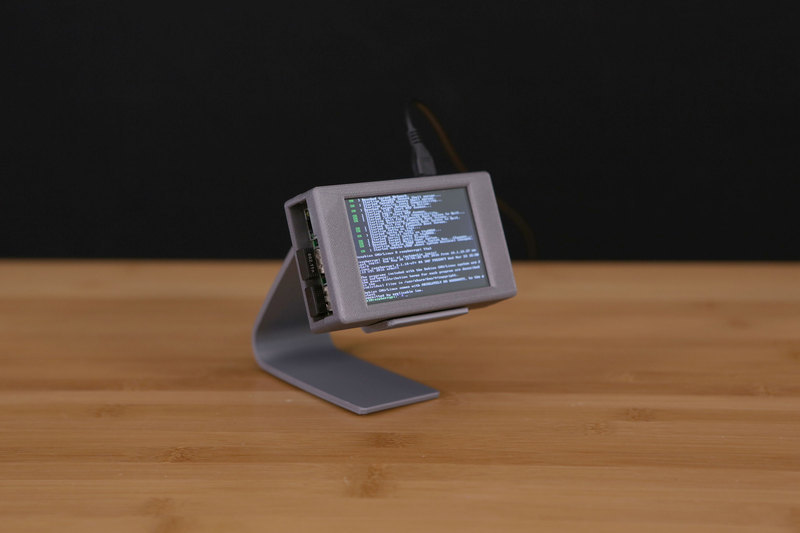
This project adds a touch screen display directly to the Raspberry Pi. An Adafruit PiTFT can be used to display the graphical interface of OctoPrint. There is no soldering or laborious assembly required - it's actually pretty easy!

Touch UI Plugin for OctoPrint

The Touch UI plugin adds a mobile friendy, responsive layout to the OctoPrint web interface. It's an easy to install add-on that auto-detects a devices screen resolution and enables large controls ideal for small touch screen displays. Check out the Touch UI plugin page for more information.

Parts

  • Raspberry Pi 2/3
  • Adafruit 3.5" PiTFT Plus 480x320 Resistive Touch Display
  • 4GB SD Card
  • USB WiFi Dongle
  • USB Keyboard

Pi + PiTFT Case

A simple 3D printed case will keep the Raspberry Pi and PiTFT display protected and enclosured. This 2-piece case is snap-fit together and requires no hardware screws to assemble. All of the ports from the Raspberry Pi 2/3 are accessible.

This case was designed for the Pi 2/3 model B and the PiTFT Plus 3.5" PiTFT PID 2441 NOT PID 2097

pitft35-bot.stl

Bottom half of case

pitft35-top.stl

Top half of the case

pistand.stl

Stand for the PiTFT

Requires support material

FAQ

Can I add a PiTFT to my existing OctoPrint rig?

That depedens! If your installation of OctoPrint is based on Raspbian Jesse Lite, then no - because this requires the X11 graphical operating system. If it does, then you should be able to install the Adafruit PiTFT scripts required to use the touch screen display.

First Steps

I suggest starting with the Adafruit 3.5" PiTFT img and installing OctoPrint ontop. Click the link below and burn the .img file to a microSD Card using the official Raspberry Pi Imager.

Second Steps

Once the card is burnt with the 3.5" image, insert it into the Raspbery Pi and plug in a 5V USB power supply to power it on. The PiTFT will display the boot screen and automatically login and load the X11 graphical user interface.

The touch screen is precalibrated so you can use it right away. Next, get the Pi onto a WiFi network by tapping on the WiFi icon on the top right and select your preferred network. Use a keyboard to enter your WiFi credentials.

Install OctoPrint on Raspbian

Now that you have WiFi setup on the Raspberry Pi, it's time to install OctoPrint. I recommend following the steps listed on the OctoPrint github page. I didn't cover them here because it's rather extensive. You have the option to run the commands through your desktop/laptop via SSH in the terminal, or directly on the Raspberry Pi and PiTFT. It's up to you, but I found doing it on my laptop faster. If you want to run the isntallation directly on the Pi, you'll obviously need a keyboard to type commands and/or copy and paste things.

Configure OctoPrint for 3D Printer

Once you've installed the dependencies and OctoPrint software, you should be able to start the OctoPrint server.

Next, you'll want to configure settings for your 3D printer, preferribly on your desktop/laptop. The default OctoPrint web interface is difficult to control on the 3.5" PiTFT, so access the web interface on your desktop/laptop by loading your Pi's IP address in your browser (ie. http://10.1.10.555:5000). From there, you can configure a printer and material profiles (under the settings icon).

Connect USB from 3D Printer to Raspberry Pi

Use a USB cable to connect the 3D printer to the Raspberry Pi. In the OctoPrint web interface, under the "connection" section, select the USB thing and braudrate (use auto option if you're unsure). Click the "connect" button and the 3D printer should connect to OctoPrint. Try homing the axises to see if it's connected.

Install Touch UI Plugin

Once your printer and material profiles are setup, then it's time to install the Touch UI Plugin. Under the settings section, goto the plugin manager and search for "Touch UI", then click the install button - OctoPrint will need to be restarted after installation (which can be done with the sudo service octoprint restart command in terminal). When OctoPrint restarts, the plug will be automatically enabled for devices with a small display.

Loading OctoPrint Web Interface on PiTFT Display

OK, so now OctoPrint is installed on the Pi and configrued with your printer/material profiles and the Touch UI plugin. Now you should be able to use the OctoPrint web interface on the Pi with the PiTFT display. Launch the epiphany web browse on the Pi and load OctoPrint (it'll be the URL http://0.0.0.0:5000). The Touch UI plugin will display a mobile friendly interface, yay!!

Connect PiTFT to Raspberry Pi GPIO

Align up the GPIO header pins from the Raspberry Pi with the headers of the PiTFT. Press the Pi and the PiTFT together until they're fully joined.

Install PiTFT

Orient the top half of the csae with the "viewable" area of the display. Notice the side of TFT display with the black strip - this should be covered up by the top half of the case. Insert the PiTFT into the top half of the case and align up the mounting holes with the standoffs. Press it down until the screen is flush with the inside of the top half of the case.

Open SD Card Door

Use the tip of a hobby knife to free the SD card door from the bottom half of the case. Insert the knife into the edge and cut along the opening to release the door. There's a thin layer near the door that allows it to be opened and closed.

Install Raspberry Pi

Place the bottom half of the case over the Raspberry PI at an angle with the ports (microUSB, HDMI and A/V jack) aligned up with the cutouts. Join the bottom half of the case with the top half and press them together until they snap shut.

Finished Case

The back of the case has a large opening for keeping the Raspberry Pi well ventilated.

PiTFT Stand

You can rest the PiTFT case on the the stand to keep it upright

This guide was first published on Jun 01, 2016. It was last updated on Mar 08, 2024.