This project explores the Adafruit PiTFT touchscreen and the Raspberry Pi camera board to create a simple point-and-shoot digital camera. One can optionally use WiFi and Dropbox (a cloud file storage and synchronization service) to automatically transfer photos to another computer for editing.

This isn’t likely to replace your digital camera (or even phone-cam) anytime soon…it’s a learning exercise and not a polished consumer item…but as the code is open source, you or others might customize it into something special that your regular camera can’t do.

Things You’ll Need:

  • Raspberry Pi computer, any model will work. This project is not especially demanding, so it’s a great use for an older board if you have one around.
  • PiTFT display w/resistive touch. Various sizes and models are available — for current Raspberry Pi boards (Pi 3, Pi 2, B+ and A+) you’ll want one of the PiTFT Plus variants. For older Pi boards (original Model B or A), a “non-Plus” PiTFT is needed. See featured product links to the right. It must be a PiTFT (connecting to the GPIO header, not composite or HDMI) with 320x240 resolution (no higher, i.e. 3.5" PiTFT won’t work), must have resistive touch, not capacitive.
  • Raspberry Pi Camera Board. Current “v2” cameras or original v1, any will do. For general work you’ll want the regular version. For special projects like security or nighttime nature photography, you can experiment with the infrared version.
  • MicroSD memory card, 4GB or larger.
  • HDMI monitor and USB keyboard are needed temporarily during setup. Once everything is configured and working, these are no longer required.

The following parts are optional:

  • A WiFi adapter allows the camera to upload photos to Dropbox (requires account, free). The Raspberry Pi 3 has WiFi built in, so this part isn’t needed with that board.
  • A USB battery pack makes the whole camera portable. If using WiFi, you’ll want a robust battery pack that can provide 1 Amp (some are limited to 500 mA max).

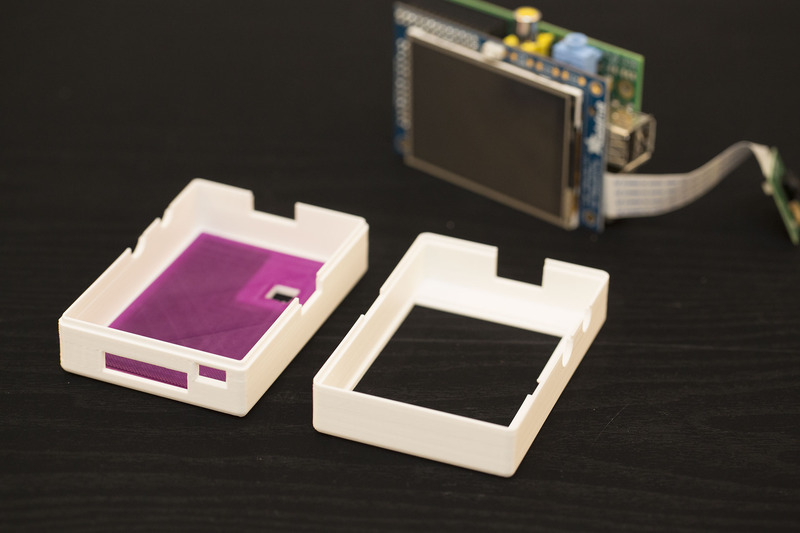
Some additional parts, tools and skills are also required: optional buttons or headers on PiTFT displays sometimes require soldering; some means of holding all the pieces together — could be as simple as a few rubber bands, to a drilled-out plastic electronics enclosure, to an elaborate custom 3D-printed case. This all depends on your available resources. Read through to see what’s involved in the project and come up with ideas along the way.

Other Raspberry Pi – Point & Shoot Cameras!
James Wolf made a Raspberry Pi - Point & Shoot Camera all inside the original Pi case (except battery). He made a little board attached to a cut down ribbon cable, just for the pull up resistors and the button - instructions, pictures and a link to the simple Python file are located on his site.

The optional tactile buttons on the PiTFT are not required for this project. You can install the buttons for other things if you like, but the camera software is entirely touchscreen-based. (Newer PiTFT variants already have all the buttons installed by default.)

Load Operating System

To ensure that all the software interdependencies work, it’s best to start with a clean installation.

Format a 4GB or larger SD card and load it up with the Raspbian operating system. This guide explains how to prepare a card for the Raspberry Pi. The Raspbian “Lite” edition is recommended for this project.

With the Raspberry Pi powered off, install the Pi camera with its ribbon connector, install the PiTFT display atop the GPIO header, connect an HDMI monitor and USB keyboard and go through the normal first-boot procedure.

After logging in, run sudo raspi-config for some basic configuration…

The following settings are useful and recommended:

  • Under Internationalization Options, change the keyboard layout to match your region. If your keyboard is producing unexpected characters, this is usually the reason why.
  • Also in International, if planning to use wireless networking, change the WiFi country setting for your location. Then you can go back to the main menu and Network Options to set up a WiFi connection.

The following are optional:

  • Under Interfacing Options, enable SSH if you’d prefer to log in remotely and finish the system configuration over a network.
  • Other settings can be configured to your liking.

The following should not be used:

  • Overclock. This is a portable, battery-operated project and an overclocked Pi will draw more current. Overclocked systems don’t always play well with the PiTFT and are more likely to corrupt the SD card filesystem. Do not enable this option.

Select “Finish” and then reboot when prompted, then more configuration awaits…

Even if you don’t plan to use the Dropbox functionality of this project, it’s necessary to get the Raspberry Pi on your network at least temporarily to download additional software. This can be done using the wired Ethernet jack (no additional configuration needed), or over WiFi using either a USB WiFi adapter or the Pi 3’s built-in wireless networking. If raspi-config doesn’t handle the options you need, this guide may be helpful for setting that up.

Do not continue until the Pi is successfully on the network. You can log in and try “ping adafruit.com” from the command-line to test.

Install & Test PiTFT

Our PiTFT installation guide covers the basic setup (see notes below for specific options):

When running the PiTFT installer script, select the #1 configuration option: “PiTFT 2.4", 2.8" or 3.2" resistive (240x320)”. This project can work with any of the resistive touch 320x240 PiTFT displays. It will not work with capacitive displays or the 3.5" PiTFT.

For rotation, select the #1 option: “90 degrees (landscape)”. This covers most situations, but if you find the screen is oriented 180° from what you need, just re-run the adafruit-pitft.sh script and select the #3 option instead (“270 degrees (landscape)”). You do not need to re-run the camera installer script we’ll show later, just the PiTFT installer.

When asked about having the text console on the PiTFT, answer “y”. Then reboot when prompted.

Make sure you've got the Raspberry Pi booting with the Text Console mode display on the PiTFT before you continue. You'll need to have that PiTFT stuff all working!

Once you have it working, log in and then shutdown with sudo shutdown at the command line

Easy Install

Our camera software requires a complex set of software dependencies. We’ve written a script that takes care of all the ugly parts. You can download and run with these three lines (this is easiest if you login via ssh and copy-and-paste these lines):

cd ~
curl https://raw.githubusercontent.com/adafruit/Raspberry-Pi-Installer-Scripts/master/pi-touch-cam.sh >pi-touch-cam.sh
sudo bash pi-touch-cam.sh

The script explains what it’s about to do and prompts for a “Y” before continuing; any other input will cancel.

It may take 10 minutes or so to run. Afterward, you’ll be prompted to reboot the system again. If this all works, skip ahead to the “Testing” section below!

Used the “Easy Install” route? Skip ahead to “Testing” below!

Complex Install From Scratch

If you used the “Easy Install” directions above, you can ignore this section and skip ahead to “Testing” below.

These are the steps taken by the pi-cam-install.sh script, if for some reason you need to perform any or all of these steps manually…

System Tweaks

The file /boot/config.txt is modified to enable the camera (if not already active via raspi-config) and also boost the speed of the PiTFT display (changing the “speed” and “fps” values). These lines are usually at the bottom of the file.

dtoverlay=pitft28c,rotate=90,speed=80000000,fps=60
start_x=1
gpu_mem=128

Install Prerequisite Software

Our code relies on a few libraries for handling the camera and screen output. One of these, it’s necessary to intentionally downgrade, in order for the touchscreen to interoperate correctly. It’s complicated. These lines in the script set that up (but don’t actually perform the downgrade yet):

# Enable Wheezy package sources
echo "deb http://archive.raspbian.org/raspbian wheezy main
" > /etc/apt/sources.list.d/wheezy.list

# Set stable as default package source (currently jessie)
echo "APT::Default-release \"stable\";
" > /etc/apt/apt.conf.d/10defaultRelease

# Set priority for libsdl from wheezy higher then the jessie package
echo "Package: libsdl1.2debian
Pin: release n=jessie
Pin-Priority: -10
Package: libsdl1.2debian
Pin: release n=wheezy
Pin-Priority: 900
" > /etc/apt/preferences.d/libsdl

Update the APT package index files and install Python libraries:

sudo apt-get update
sudo apt-get -y --force-yes install python-picamera python-pygame python-imaging

Now we perform the actual SDL library downgrade (it has to follow the “apt-get update” above):

apt-get -y --force-yes install libsdl1.2debian/wheezy

Download the Camera and Dropbox Scripts

Just a couple more steps to download and uncompress these…

cd ~pi
wget https://github.com/andreafabrizi/Dropbox-Uploader/archive/master.zip
unzip master.zip
rm master.zip
mv Dropbox-Uploader-master Dropbox-Uploader

wget https://github.com/adafruit/adafruit-pi-cam/archive/master.zip
unzip master.zip
rm master.zip

Modify /etc/rc.local for auto-start (but don’t enable)

These lines are added to /etc/rc.local — the second is intentionally commented out by default. It’s a good idea to test the camera software manually before throwing the switch. These are inserted just before the final “exit 0” line that’s normally present.

# Enable this line to run camera at startup:
# cd /home/pi/adafruit-pi-cam-master ; sudo python cam.py

Testing

Now give it a try. The software must be run as root (using the sudo command) in order to access the TFT display:

cd adafruit-pi-cam-master
sudo python cam.py

If all goes well, after a few seconds’ initialization you should see a live viewfinder preview on the screen, as well as two onscreen buttons.

If this doesn’t happen, an error message should give some sort of troubleshooting guidance; missing library or driver, etc.

There’s still some work to be done if we want to use Dropbox, so quit the camera program for the time being…tap the gear icon (settings), the left arrow and then the confirmation button. You’ll be back at the command line now.

Standalone mode

You can have the Pi boot straight into the camera software at startup by editing /etc/rc.local (this must be done as root, so “sudo” your text editor of preference):

sudo nano /etc/rc.local

If you use the Easy Install script, the following line is already present, but commented out. Delete the initial “#” character on the line, save changes and reboot.

Otherwise, if doing this the long way, add the following line just before the final “exit 0”:

cd /home/pi/adafruit-pi-cam-master; python cam.py

Next time you reboot you should see the text console for a few seconds and then it will start the cam.py software.

Dropbox is a “cloud” file storage and syncing service. A basic account is free and offers two gigabytes of storage. We can leverage this as a means of getting photos off the Raspberry Pi onto other devices (desktop computer, etc.) without cables or swapping cards.

This pretty much requires a WiFi connection; trying to work a camera with an Ethernet cable continually attached would get tiresome. It also requires being in range of your wireless access point, with the Raspberry Pi suitably configured for access.

We’ll use this guide from RasPi.TV (with minor changes as Dropbox has evolved) to get Dropbox and the Raspberry Pi to work together. The steps include:

  • Set up Dropbox account if you don’t already have one.
  • Locate the Dropbox Uploader software on the Raspberry Pi.
  • Create a Dropbox app and get access credentials.

1. Create a Dropbox account if you don’t already have one.

A basic account (2GB limit) is free. Sign up at Dropbox.com.

2. Locate the Dropbox Uploader software

There should be a folder called “Dropbox-Uploader” in the pi user’s home directory. The camera installer script downloaded and placed it there.

cd ~/Dropbox-Uploader

3. Create a new Dropbox App through the Dropbox developer site

Visit https://www.dropbox.com/developers/apps and log in with your Dropbox account credentials.

Use the “Create app” button to begin the process…

Select “Dropbox API” and “Full Dropbox,” then assign your app a unique name (e.g. “Bob’s Raspberry Pi Camera”), then click “Create App.”

In the Settings tab for your new app, there’s a section with the heading “OAuth 2.” Look for the button “Generate access token.” This will give a long string of seemingly random letters — a unique identifier for tying your camera to your Dropbox account. (This is different from the “App key” and “App secret” — don’t use those — look for the long access token!)

This last step is easiest if you have SSH enabled on the Pi and are logged in through a terminal program, so you can just copy-and-paste rather than having to type in that whole string exactly…

4. Set up Dropbox Uploader

You should be inside the Dropbox-Uploader directory at this point (i.e. typing “pwd” should return “/home/pi/Dropbox-Uploader”).

Run the dropbox_uploader.sh script:

./dropbox_uploader.sh

You’ll be prompted to enter your access token that was generated in Step 3. This must be exact, which is why ssh and copy-and-paste is so helpful.

If you mess up this process, you can run “./dropbox_uploader.sh unlink” to clear out Dropbox Uploader’s settings and start over.

Let’s test it!

echo 12345 > foo.txt
./dropbox_uploader.sh upload foo.txt /

This will create a small text file (foo.txt) containing the string “12345” and will upload it to the root level of your Dropbox drive. If Dropbox is installed on your “main” computer the file should appear there after a moment, else use a web browser to log into your Dropbox account and you should see it there among your files.

If this works, then next time you run the cam.py script you can go into Settings and select Dropbox for storage. Photos will be saved both in the “Photos” folder and uploaded immediately to Dropbox.

You briefly saw the camera interface during testing. We can explain in more detail now how it works and what options are available.

Upon startup, the camera program presents a live viewfinder and a couple of buttons. The majority of the screen itself functions as the shutter “button” — tap to take a still photo.

At the bottom of the screen are two buttons. The left button (with the gear icon) will take you to various settings. The right button (with the “play” symbol) lets you review previously-taken photos (if no photos have been taken yet, the camera will let you know it’s “empty”).
The Settings menu provides access to camera settings. This is not an exhaustive list of every feature possible with the Raspberry Pi camera, just a few essentials to get you started.

The left/right arrow buttons at the top of the screen select among the settings options:
The Storage screen selects between three different options, each with some pros and cons:

  • Photos Folder: images will be saved inside a “Photos” folder in your Raspberry Pi home directory (the folder will be created if it doesn’t exist). They can be easily accessed from other programs on the Pi, but this partition isn’t easily accessed when inserting the SD card in other computers.
  • Boot Partition: images will be saved in the folder “/boot/DCIM/CANON999” on the boot partition. When the SD card is inserted in another computer, it mimics a card from a digital camera and may import photos automatically, depending on system settings. The downside is that space in the boot partition is very limited; you might only store a dozen or so photos there.
  • Dropbox: as previously discussed, images are saved in the Photos folder as well as uploaded to Dropbox (if WiFi is connected and Dropbox configured).
The Size screen selects from three different image sizes:

  • Large (2592x1944, 4:3 ratio): this is the largest size (5 megapixels) supported by the Raspberry Pi camera. The actual area captured stretches well beyond what’s shown in the live viewfinder though.
  • Medium (1920x1080, 16:9 ratio): HD resolution, widescreen, 2 megapixels.
  • Small (1440x1080, 4:3 ratio): 1.5 megapixels.
The latter two modes should display the actual full photo boundaries in the live viewfinder mode, but don’t yet (something in the camera library documentation doesn’t correspond to reality). This is a work in progress and will be addressed once its understood.
The Effect screen is where all the fun happens.

There are 16 different artistic effects that can be applied to photos (plus “normal,” no effect). Make your photos look like an oil painting, or a pen sketch, or turn the colors weird! These all operate on the live preview as well.
The ISO setting adjusts the camera’s sensitivity to light.

This is a tradeoff…more sensitive settings (higher numbers) work better in low light, but the resulting image may be grainy.

ISO has no effect on the live viewfinder, only captured photos.
The last screen is an option to quit the camera program, returning to the command line.

Tap the red button to exit, the arrow buttons for other settings, or the Done button to cancel.
The “Done” button returns to viewfinder mode.

All the camera settings will be saved; next time you run the script, all prior settings will be as you left them.
This is just a taster. Where you go next is up to you…
  • The camera board could be swapped out for the infrared-sensitive Pi NoIR camera.
  • The Icon and Button classes in the cam.py script are pretty rudimentary, but might be sufficient for your own touchscreen applications (whether photography-related or otherwise).
  • The camera code could be expanded to do new things. There are lots of camera settings we haven’t even touched. Other capabilities like a self-timer, intervalometer or motion detection could be added. Or capturing video.
Look at this embarrassing assemblage of rubber bands! There’s so much more that could be done here for a proper enclosure…perhaps even laser-cut or 3D-printed if you have access to such.
The package could be slimmed down considerably; there’s a huge amount of empty space between the PiTFT and Raspberry Pi (even more with a Model A board). Advanced makers could squeeze a slim LiPo battery and a 5V boost converter in there, connecting to the expansion header at the right edge of the TFT board instead of the side-protruding USB power connector. The result would be similar in size to some consumer point-and-shoot digital cameras.
This case design fits the ORIGINAL Model B Pi. For newer boards such as the Pi 3, check Thingiverse.com for alternative case designs that could be adapted.

3D Print a Camera Enclosure!

We designed a multi-part enclosure that snap fits together. Optimized for PLA to print without any rafts or supports! Follow our recommend print/slicing settings for best results. Our assembly guide walks your through the process of putting it together.

Snap-fit color enclosure

Print pitouch-cover.stl file in a different color for a stylish look. We used transparent green PLA for the cover and true white for the rest, but you can choose any color you like.

Optional Parts

  • pitouch-tripod.stl If you don't want a Tripod Mount
  • pitouch-band.stl If you don't want Grippy edges
  • pitouch-camring.stl If you don't want interchangeable lenses.

pitouch-top.stl
about 75 minutes
14g

Houses the camera and Raspberry Pi. Snaps to pitouch-bottom.

PLA @230 C
2 shells
15% Infill
0.2mm Layer Height
90/150mm/s

pitouch-bottom.stl
about 70 minutes
13g

Houses the touch screen and Raspberry P.

PLA @230 C
2 shells
15% Infill
0.2mm Layer Height
90/150mm/s

pitouch-cover.stl
about 30 minutes
6g

Fits inside pitouch-top.stl. Raspberry Pi Camera press-fits to cover.

PLA @230 C
2 shells
15% Infill
0.2mm Layer Height
90/150mm/s

pitouch-tripod.stl
about 35 minutes
6g

Mounts to bottom of pitouch-top.stl and pitouch-bottom.stl

PLA @230 C
2 shells
15% Infill
0.2mm Layer Height
90/150mm/s

pitouch-band.stl
about 25 minutes
5g

Attaches to sides of pitouch-top.stl and pitouch-bottom.stl. Adds grip and keeps pitouch-tripod mounted to pitouch-top.stl and pitouch-bottom.stl.

NinjaFlex @225 C
2 shells
15% Infill
0.2mm Layer Height
90/150mm/s

pitouch-camring.stl
about 3 minutes
0.5g 

Snaps to pitouch-top.stl camera hole. 

PLA @230 C
2 shells
15% Infill
0.2mm Layer Height
90/150mm/s

Mounting Pi Cam

Start by adding a piece of tape to the back of the camera's PCB, to prevent any shorts. Use a short ribbon cable and flip it over to the back of the Pi, covering the ethernet port.

Position the camera with the camera hole in the pitouch-cover.stl part. Align it up so the nubs snap into the left and right mounting holes of the pi cam. Press fit the cover into the pitouch-top part.

Position the pitouch-top part over the Raspberry Pi and angle it down so the SD card slot slips into the proper opening of the pitouch part.

Note: The camera in the photo is plugged into the incorrect port.

Adding Lenses

Snap the pitouch-camring part into the camera hole of the pitouch-top part. Insert a 12mm split ring into the pitouch-camring. The photojojo lens use magnets for mount and connects to the split ring.

Mounting the Raspberry Pi and Touch Screen

With the camera and pi mounted to the pitouch-top part, flip the the body and place the pitouch-bottom part over the touch screen. Press the pitouch-bottom part down snapping the parts together.

Adding Side Bands and Tripod Mount

You can optionally add a tripod mount and grippy bumpers. The Tripod mount can be attached to the bottom of the camera body with 4 small screws. Align up the holes and add screws. Add a standard tripod nut to the bottom of the tripod for attaching to other tripod mounts.

Upload, Share and Make

Plug in power to the micro-USB port and photos to your hearts content! If you do make one, please be sure to snap a picture of your creation and click the "I Made One" button to our thingiverse design so we can feature it on our blog!

This guide was first published on Jan 14, 2014. It was last updated on Apr 11, 2024.